Quickbooks Online connector for Creatio
Overview

Product overview
The QuickBooks Online Connector for Creatio is an integration between QuickBooks Online, a popular accounting system, and Creatio platform. It enables efficient handling of financial processes within Creatio by synchronizing vital data between the two systems.
Use cases:
The connector will be useful for companies that seek to streamline their financial operations by seamlessly integrating their accounting processes with customer relationship management. It caters to businesses looking to enhance efficiency, accuracy, and collaboration across departments by integrating their QuickBooks Online accounting system with Creatio.
Overall, the QuickBooks Online connector for Creatio empowers businesses to optimize their financial processes, improve data accuracy, and enhance collaboration by integrating QuickBooks Online with Creatio seamlessly.
Notes:
Synchronization of other records/fields is possible through additional development. Please, contact us for further details info@btbpm.com
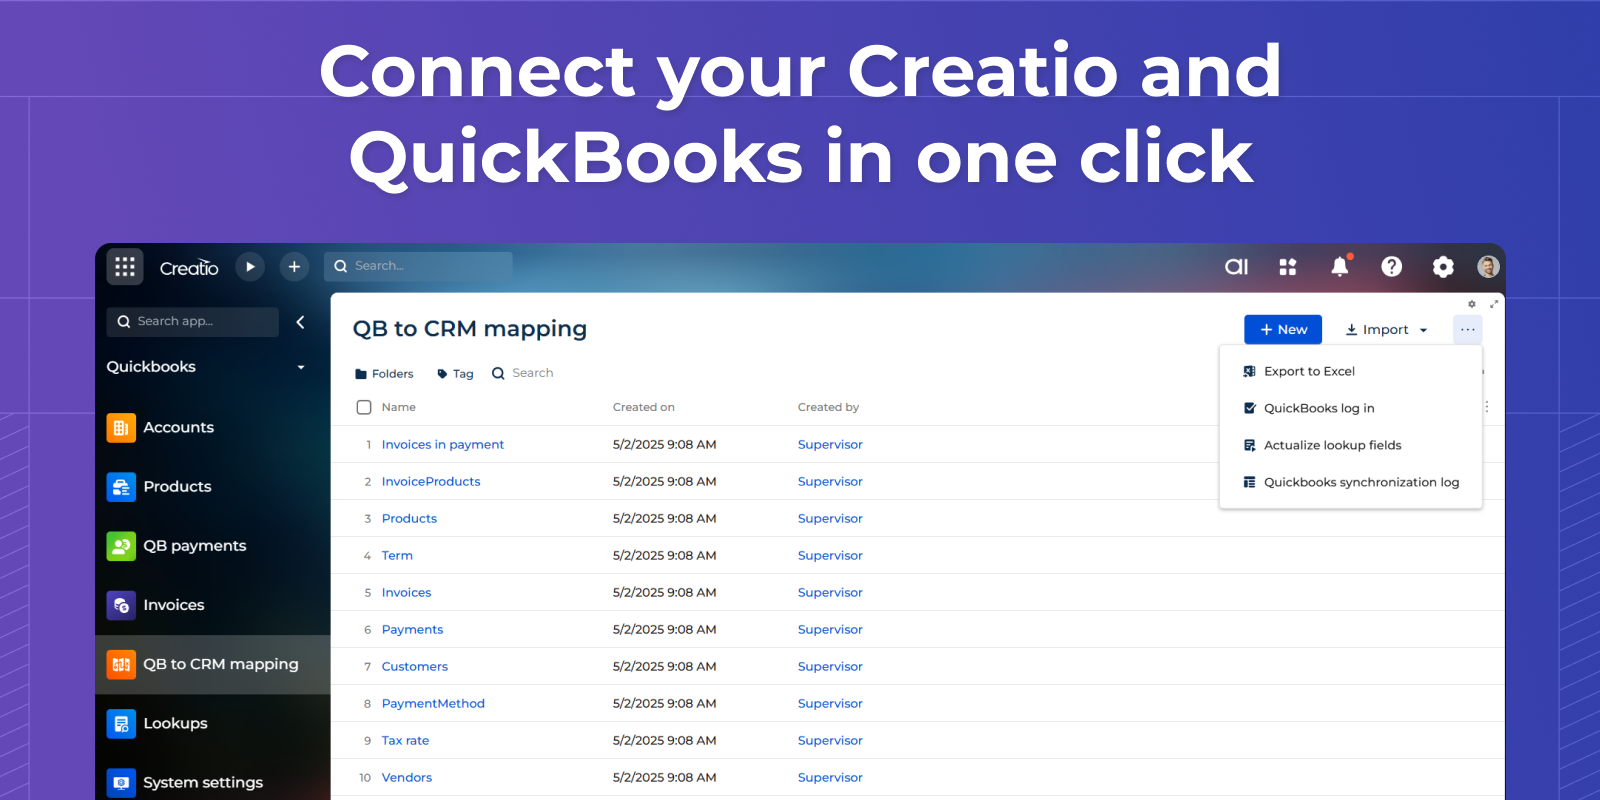
Key Features
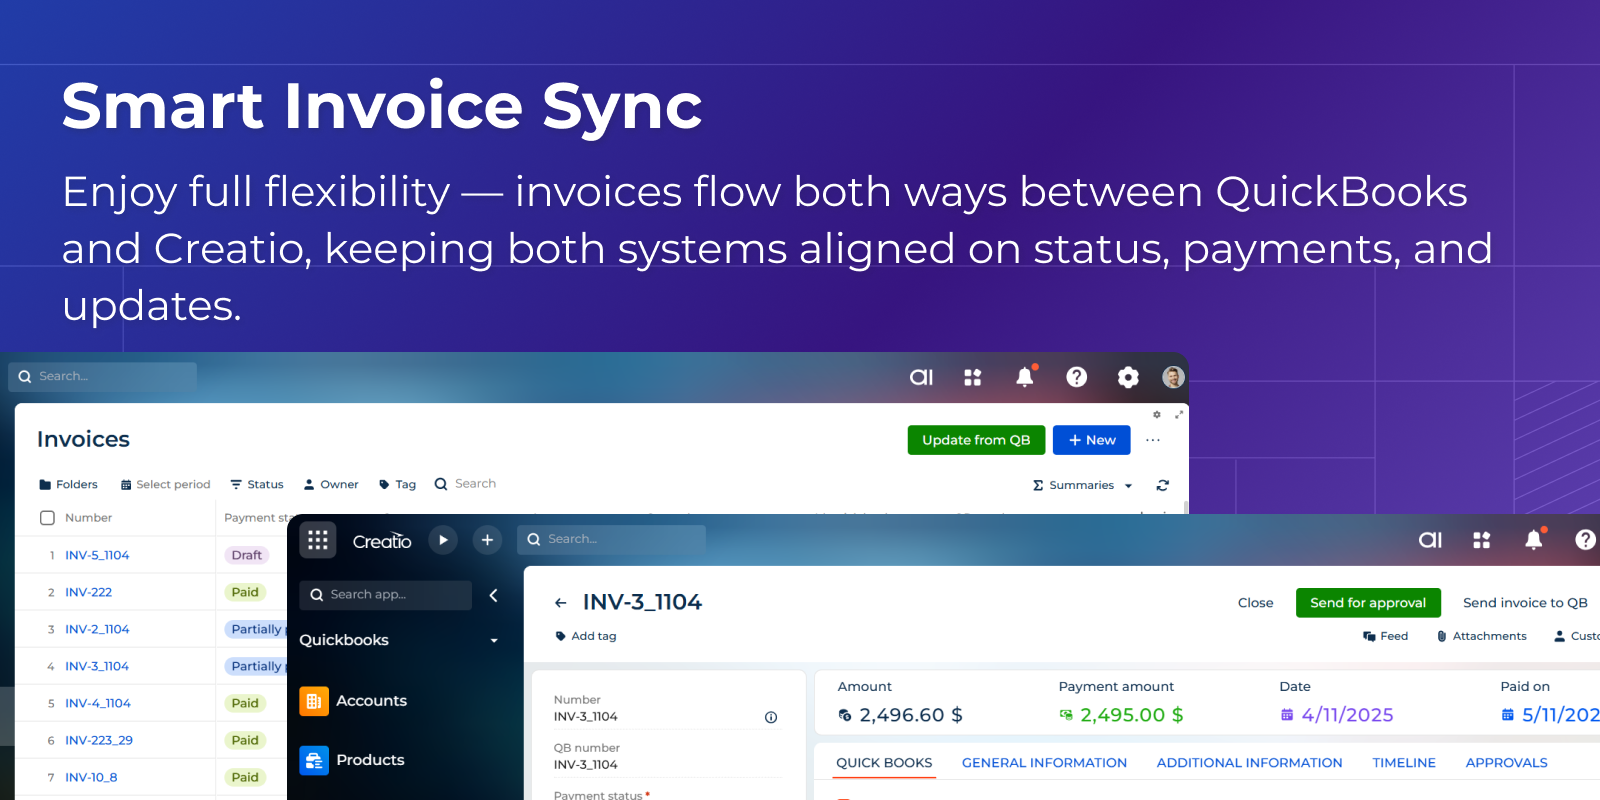
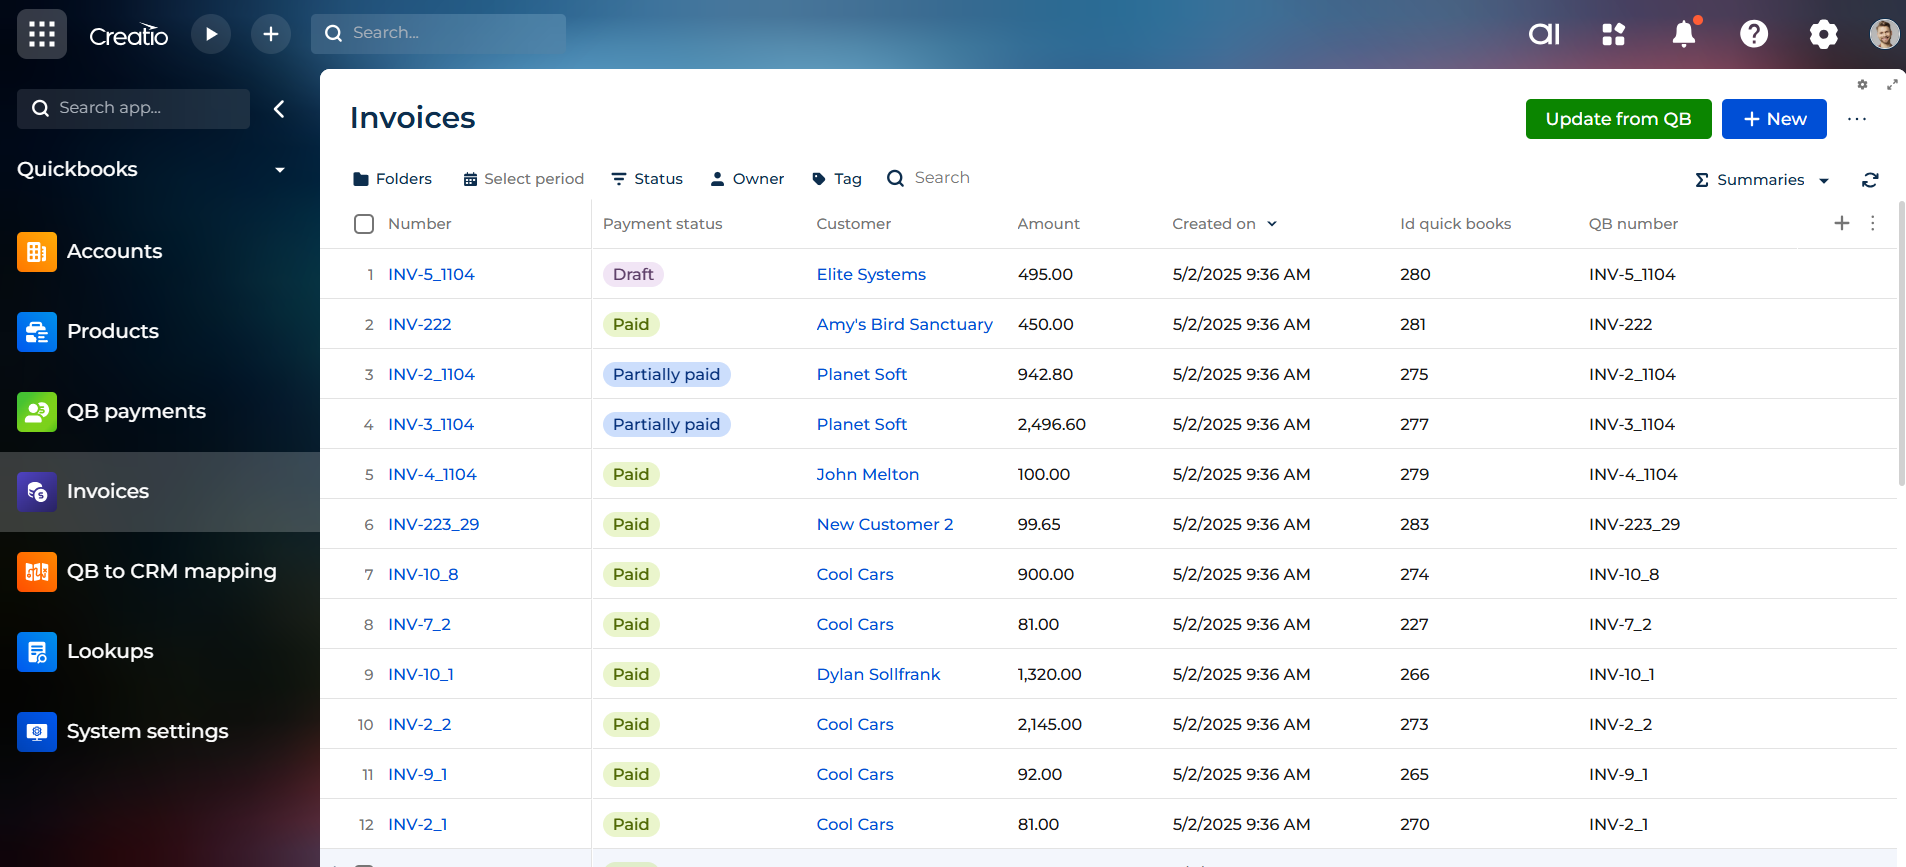
Two-Way Invoice Synchronization
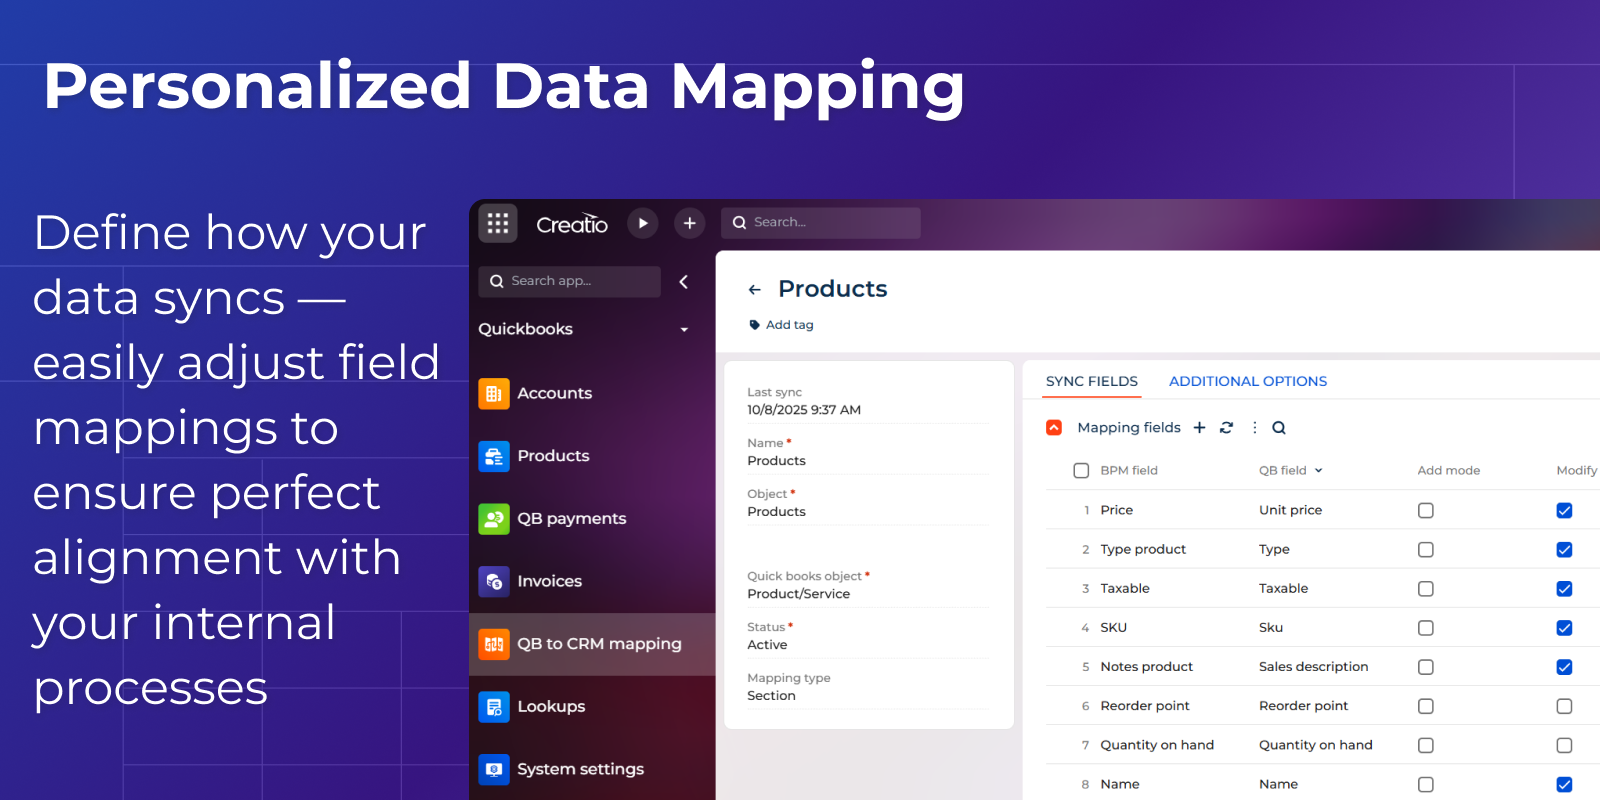
Flexible Field Mapping
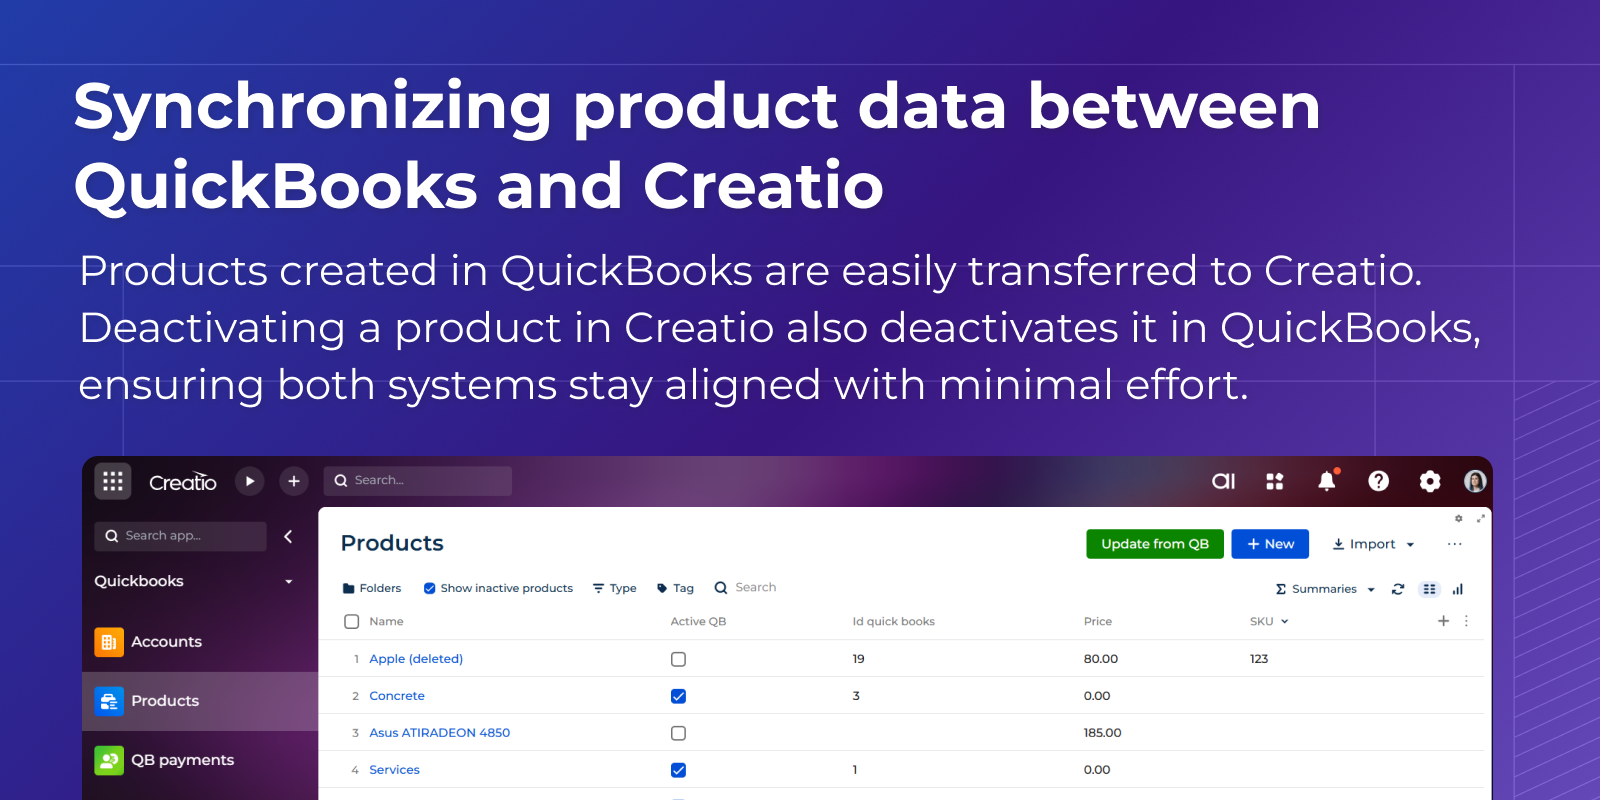
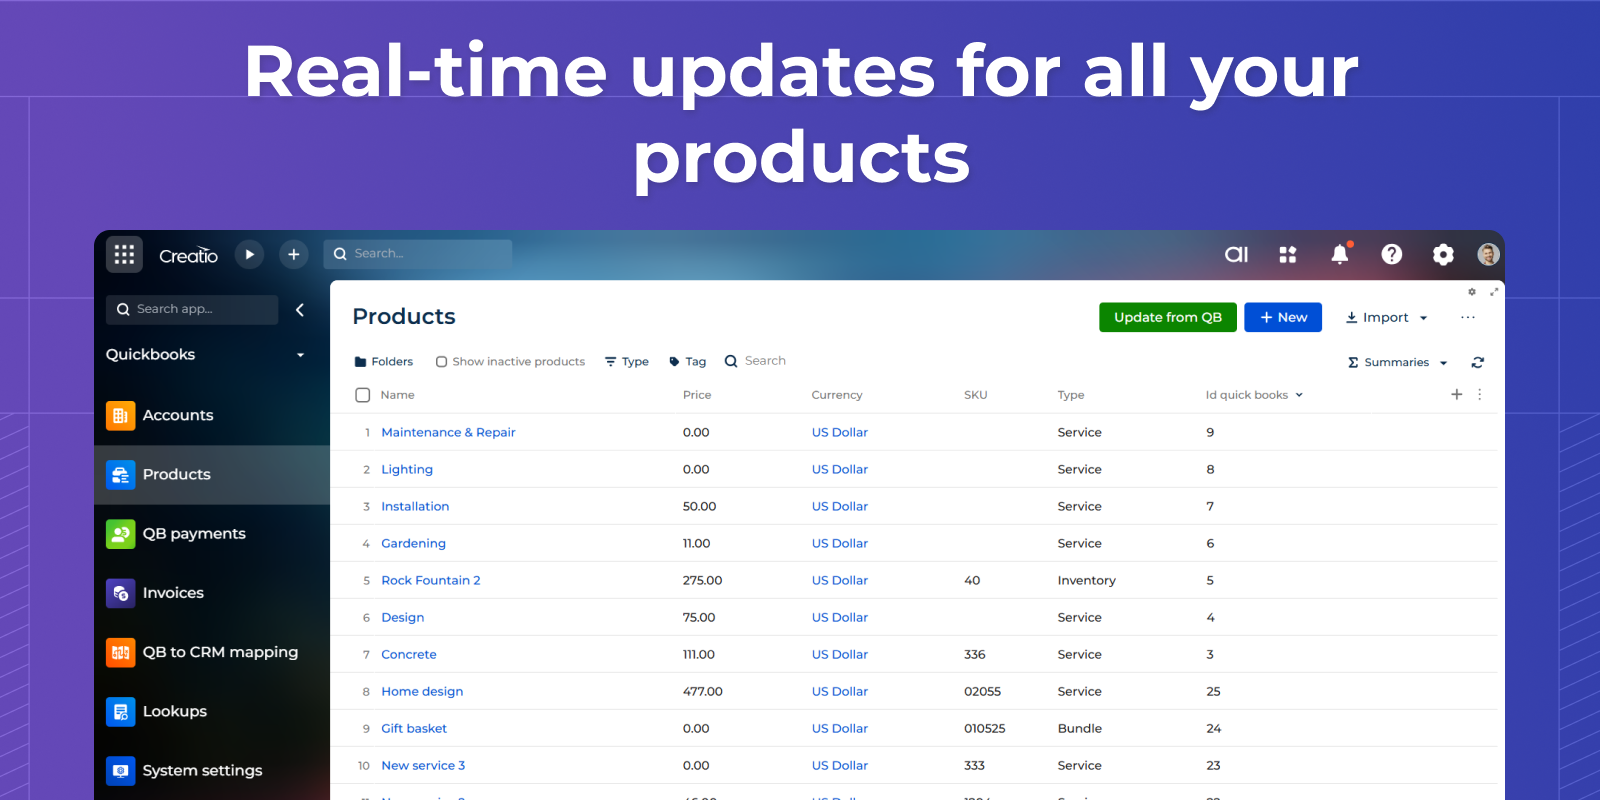
Exchange of product information
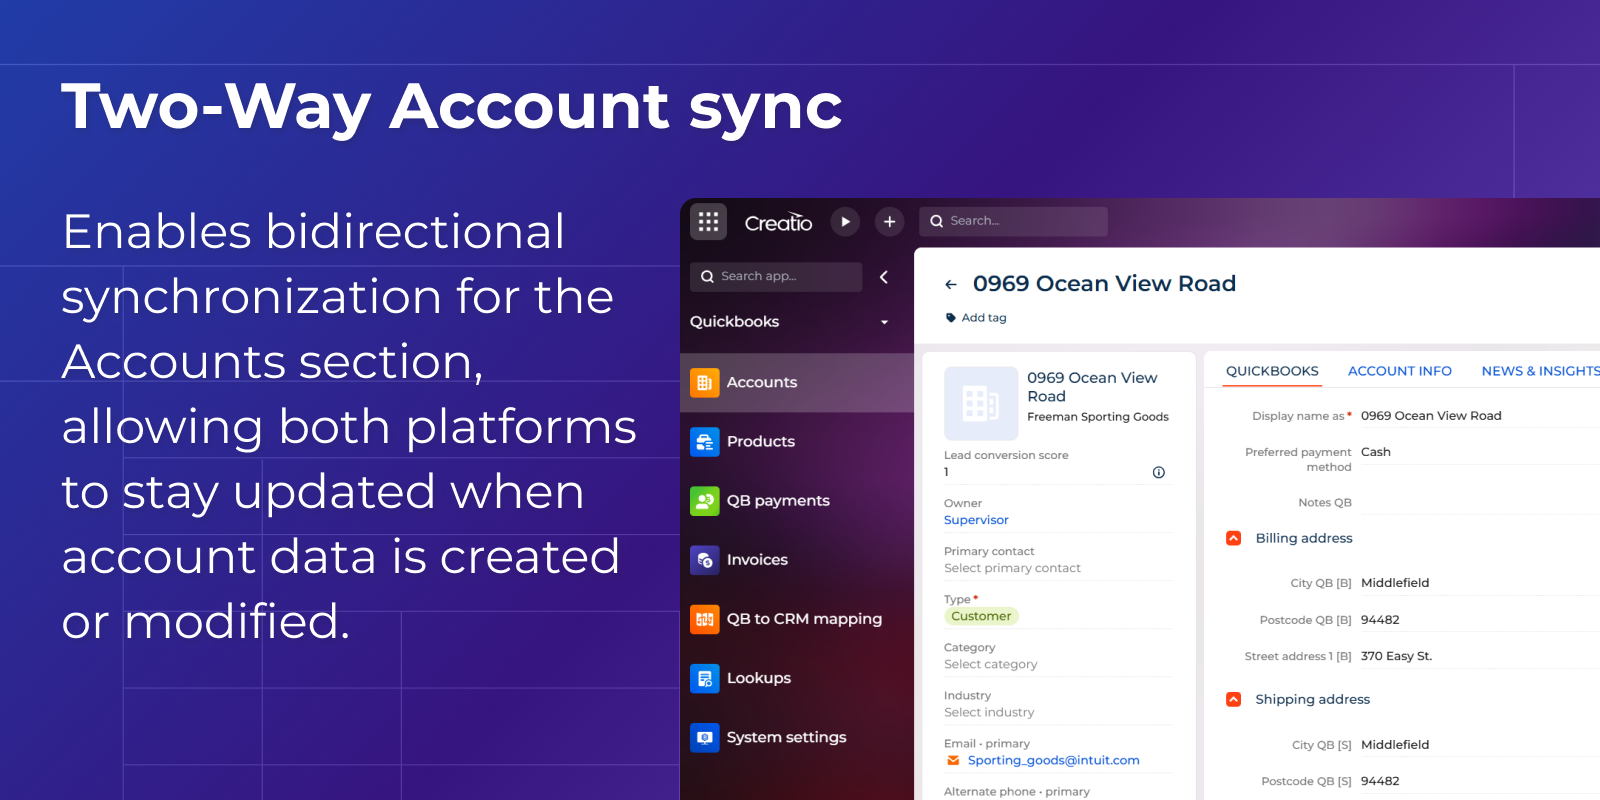
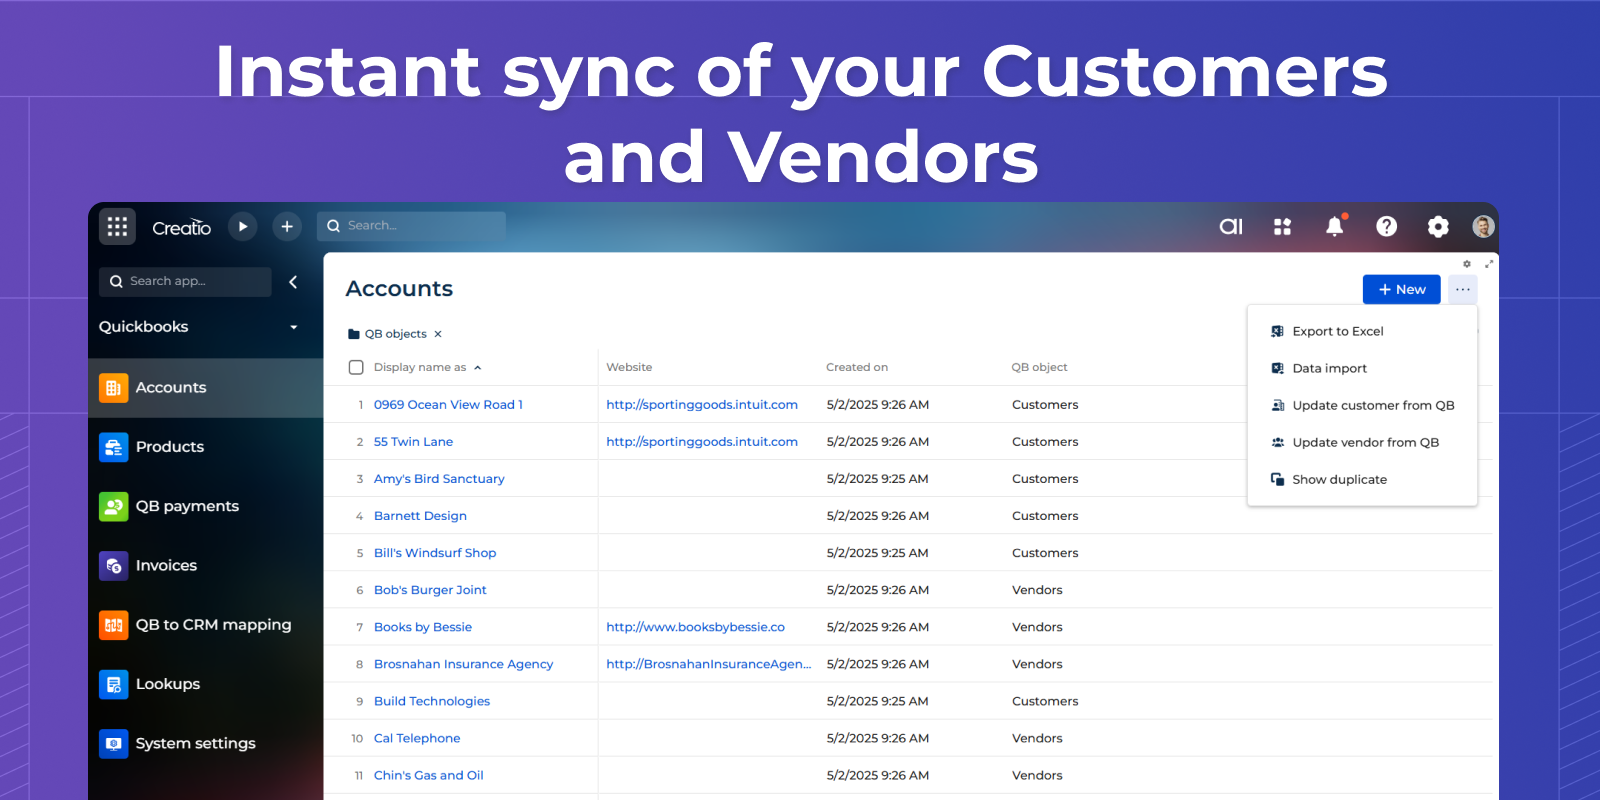
Bidirectional Account synchronization
Pricing
Terms and Conditions
Support
Installation
Setup guide
Resources
Data sharing
- By installing or downloading the App, you confirm that you agree with sharing your account data (name, email, phone, company and country) with the App Developer as their End User.
- The App Developer will process your data under their privacy policy.
Versions
Versions history
- Added bidirectional synchronization for the Accounts section.
- Enabled marking a Product as inactive on the Creatio side with bidirectional sync support.
- Added an Amount Tax field on the Invoice page to display the tax amount retrieved from QuickBooks.
Added a new process “Changing payment status in Invoice"
Сompatibility update to Creatio Freedom UI.
Added a new process “Changing payment status in Invoice"
Manual app installation
- Open the needed app → the Packages tab - download the Markeplace app files.
- Click in the top right → Application Hub
- Click New application. This opens a window.
- Select Install from file and click Select in the window that opens.
- Click Select file on the page of the Marketplace App Installation Wizard and specify the app file path.