Razorpay Payment connector for Creatio
Overview

Product overview
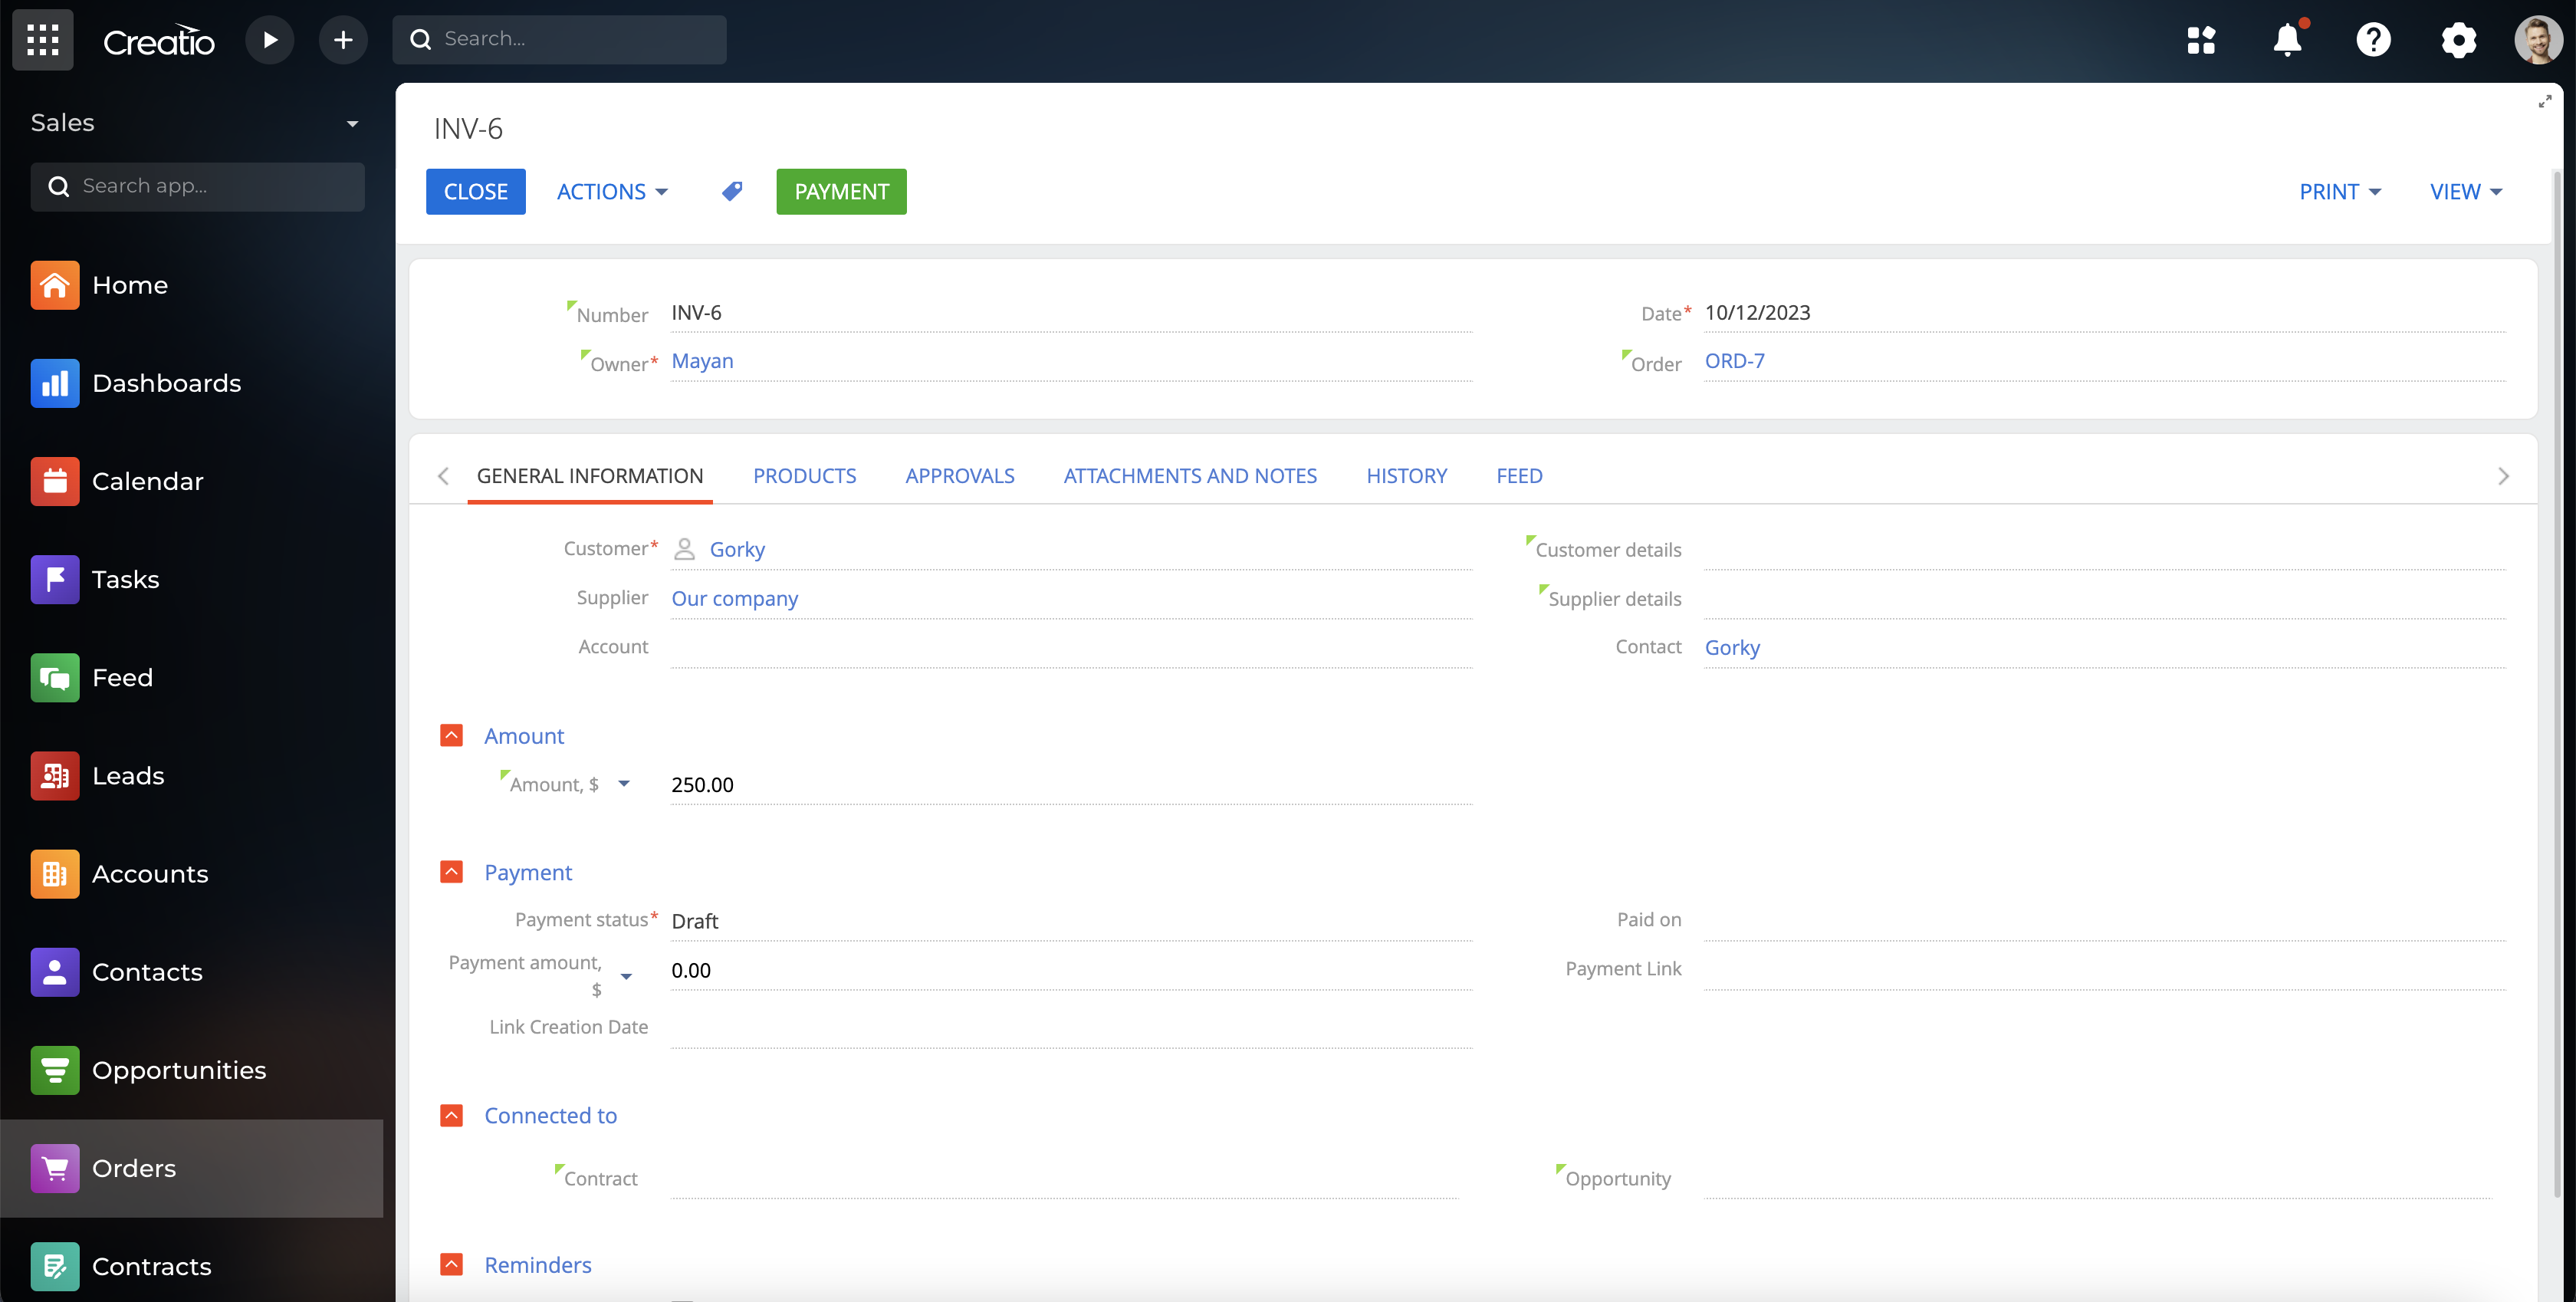
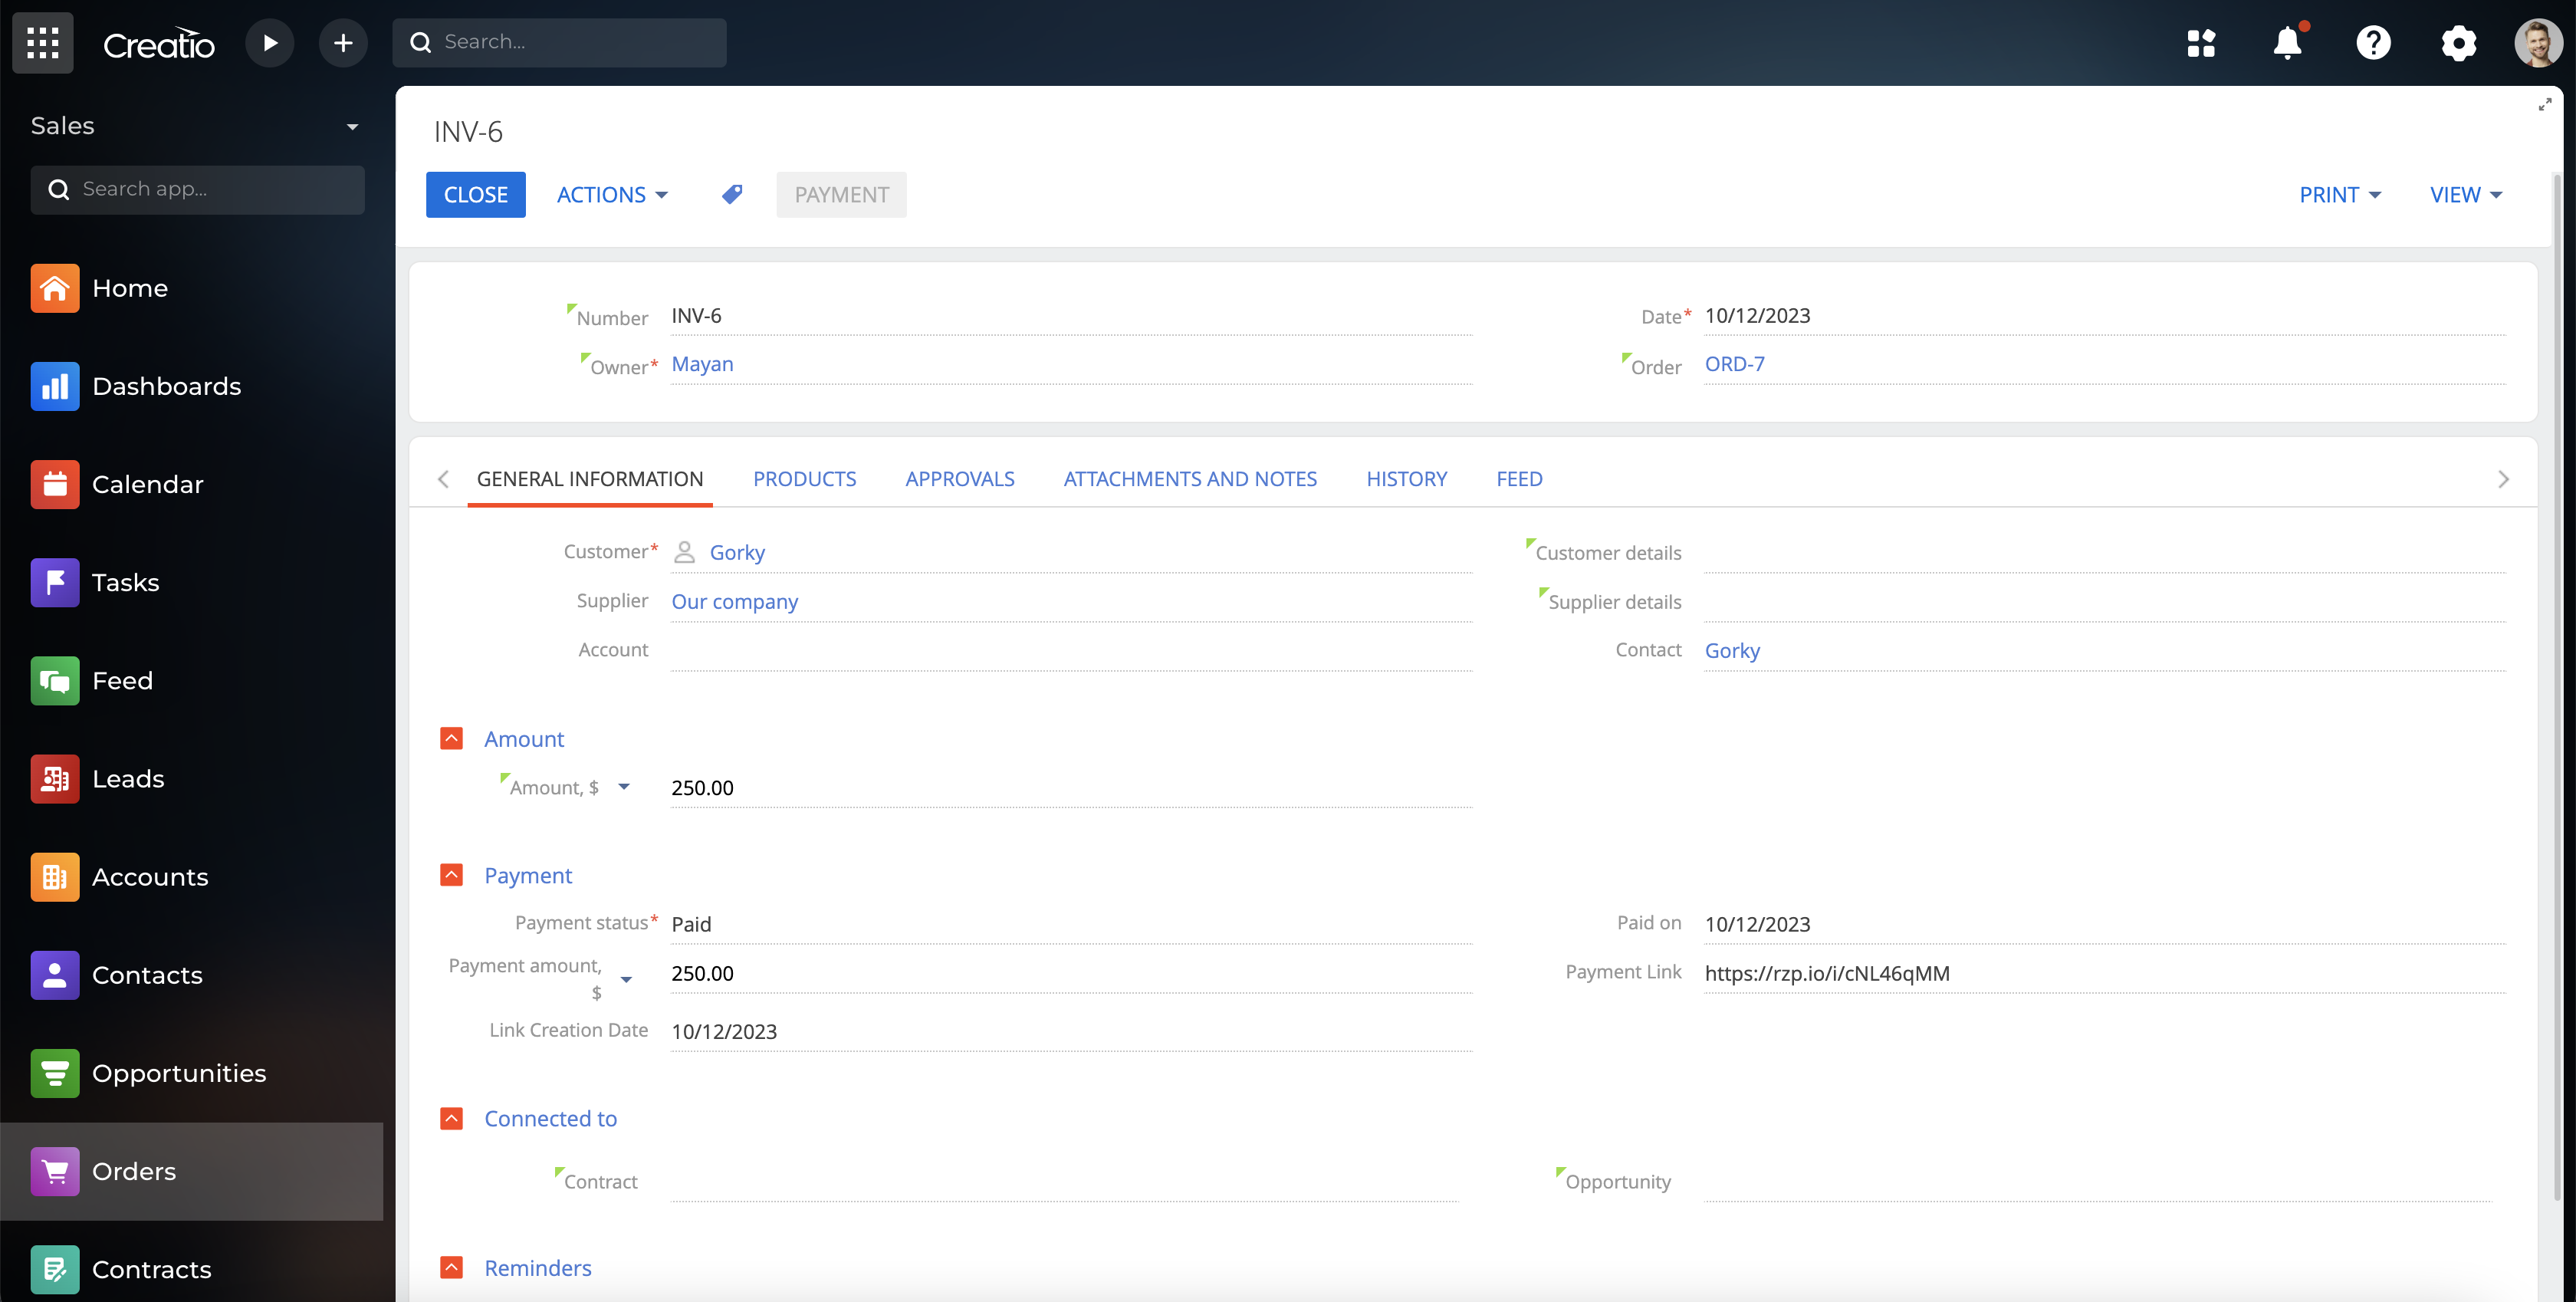
Razorpay Payment connector for Creatio : This connector, integrated into Creatio, facilitates seamless payment of invoices by connecting with Razorpay, enabling direct payment initiation and processing.
Use cases:
Previously, payments occurred outside the system via invoicing, requiring manual updates by the sales team post the payment is made.
To enhance efficiency:
- We've integrated a custom payment button with Razorpay.
- Now, sales can click on the payment button and share the payment link via SMS and email.
- Once the customer pays through the link, the invoice status automatically updates to "paid" eliminating manual intervention and simplifying the process.
Key features:
The following points explain how the Razorpay payment plugin contributes to sales orders:
- Providing customers with a direct payment link via SMS and email makes the process more convenient and seamless.
- Customers can easily initiate payments, leading to quicker settlements and a positive experience.
- Automating the payment status update eliminates the need for salesperson involvement, saving valuable time and resources.
- The streamlined process reduces administrative tasks, allowing the sales team to focus on higher-value activities, ultimately boosting productivity.
Note:
A valid Razorpay account (https://dashboard.razorpay.com/) is required for proper functionality with the plugin, in order to obtain the RazorPay Key Id and Key secret.
Pricing
Terms and Conditions
Support
Installation
Setup guide
Once the Plugin is installed, you need to perform the make the following changes in Creatio.
- Update System Settings for Razorpay Key ID and Razorpay Key Secret
- Add Reference Code Mask ID
- Create Razorpay Webhook
Update Razorpay Key ID and Razorpay Key Secret in System Settings:
- Go to the "System designer" > "Razorpay Key ID", In the Default value box, enter Live Razorpay Key ID, obtained from your Razorpay account
- Similarly, "System designer" > Razorpay Key Secret, , In the Default value box, enter Live Razorpay Key Secret, obtained from your Razorpay account
Add Reference Code Mask ID:
- Navigate to the Lookups section -> Reference Code Mask, In the Code Mask box, replace the existing code mask with four alphabetical characters which will be used as reference ID while generating payment link
Setting up the webhook connection between the Creatio instance and Razorpay:
- Navigate to the Contact section within your Creatio instance.
- Click Import and choose Web Forms and Pages.
- Click Click to get your API Key.
- Click to copy the API key. Add this URL with your API key in the Razorpay Webhook URL box: https://webhooks.creatio.com/webhooks/{API_KEY}
- Navigate to https://dashboard.razorpay.com/.
- In the left pane, choose Account & Settings.
- In the Website and app settings section, choose Webhooks.
- Click Add New Webhook.
- In the Webhook URL , provide the webhook URL copied in step 4.
- In the Active Events section, select all four payment link options available under Payment_link Events:
- payment_link.paid
- payment_link.partially_paid
- payment_link.expired
- payment_link.cancelled
- Click Create Webhook to finalize the set up.
- The webhook connection between Creatio and Razorpay is now set up.
Data sharing
- By installing or downloading the App, you confirm that you agree with sharing your account data (name, email, phone, company and country) with the App Developer as their End User.
- The App Developer will process your data under their privacy policy.
Versions
Versions history
Manual app installation
- Open the needed app → the Packages tab - download the Markeplace app files.
- Click in the top right → Application Hub
- Click New application. This opens a window.
- Select Install from file and click Select in the window that opens.
- Click Select file on the page of the Marketplace App Installation Wizard and specify the app file path.
A valid Razorpay account (https://dashboard.razorpay.com/) is required for proper functionality with the plugin, in order to obtain the RazorPay Key Id and Key secret.