Gmail Add-on for Creatio
Overview

Product overview
Gmail Add-on for Creatio allows users to process and connect emails from Gmail to Creatio records.
Use cases:
- Add New Contact and Account to Creatio.
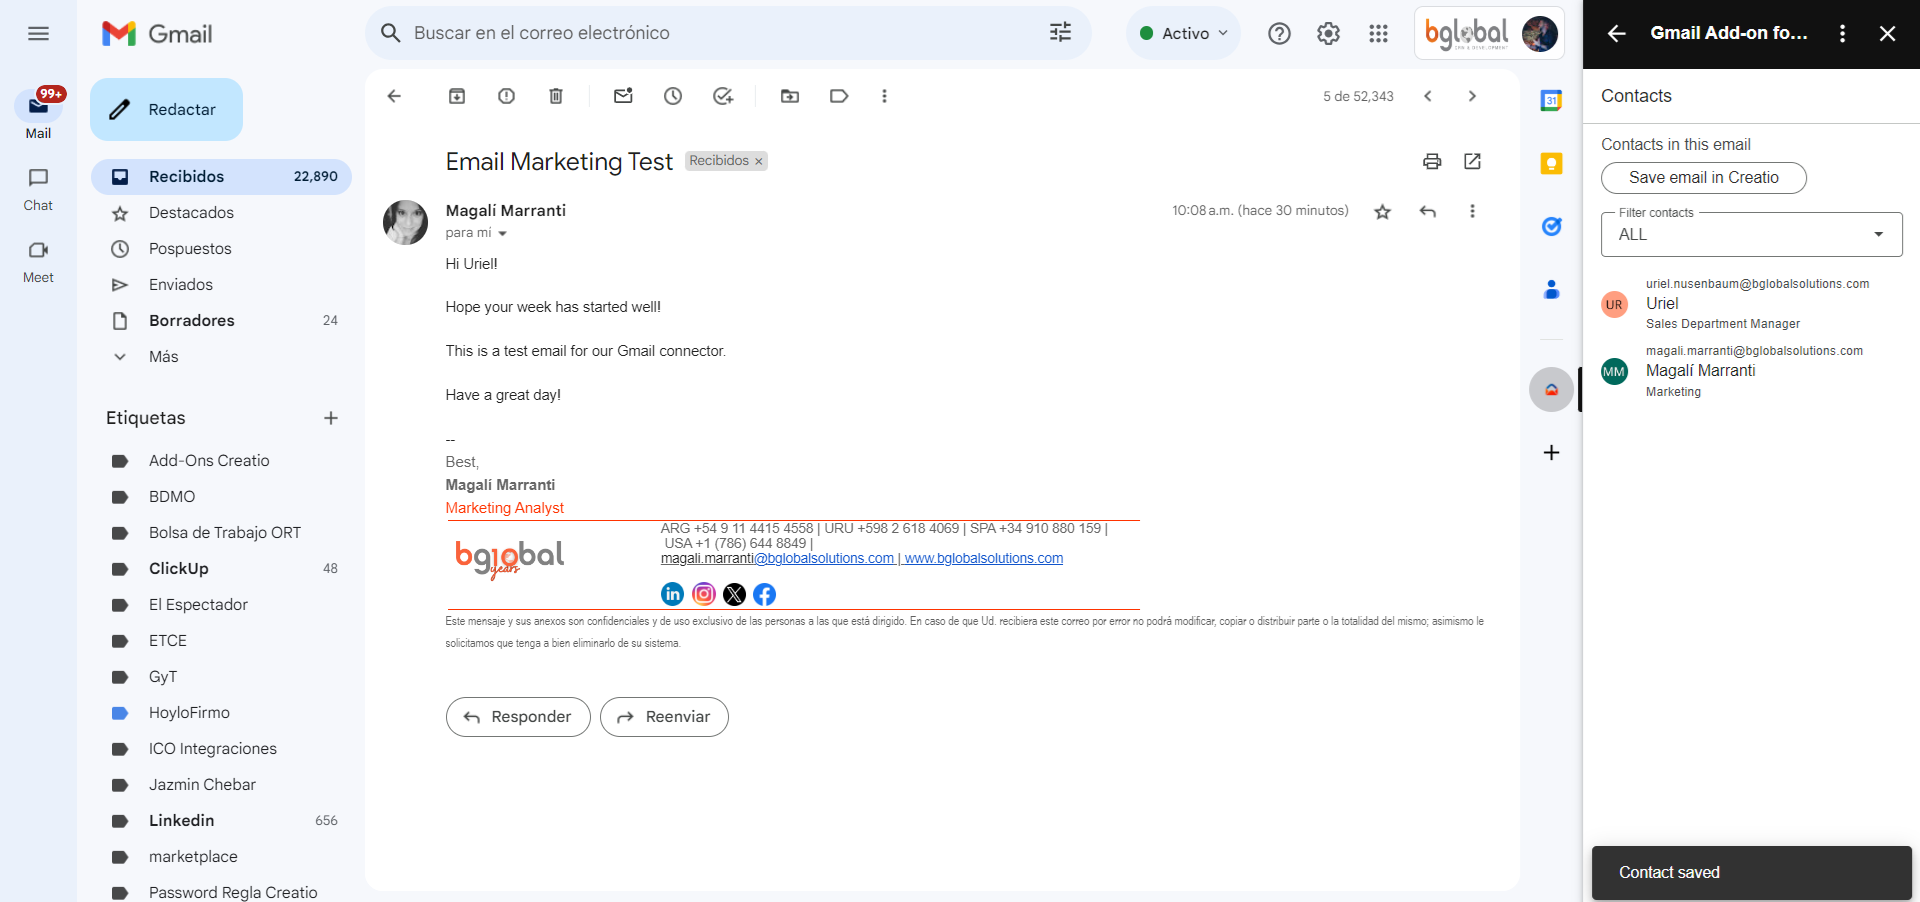
- Link inbound emails to the From contact or any CC'd contact.
- See if the contact has Cases or Opportunities.
Key features:
- Easy setup
- No package installation in Creatio
- Connect emails with Creatio Contacts and Accounts. Email addresses will be considered the key field to search for existing contact records.
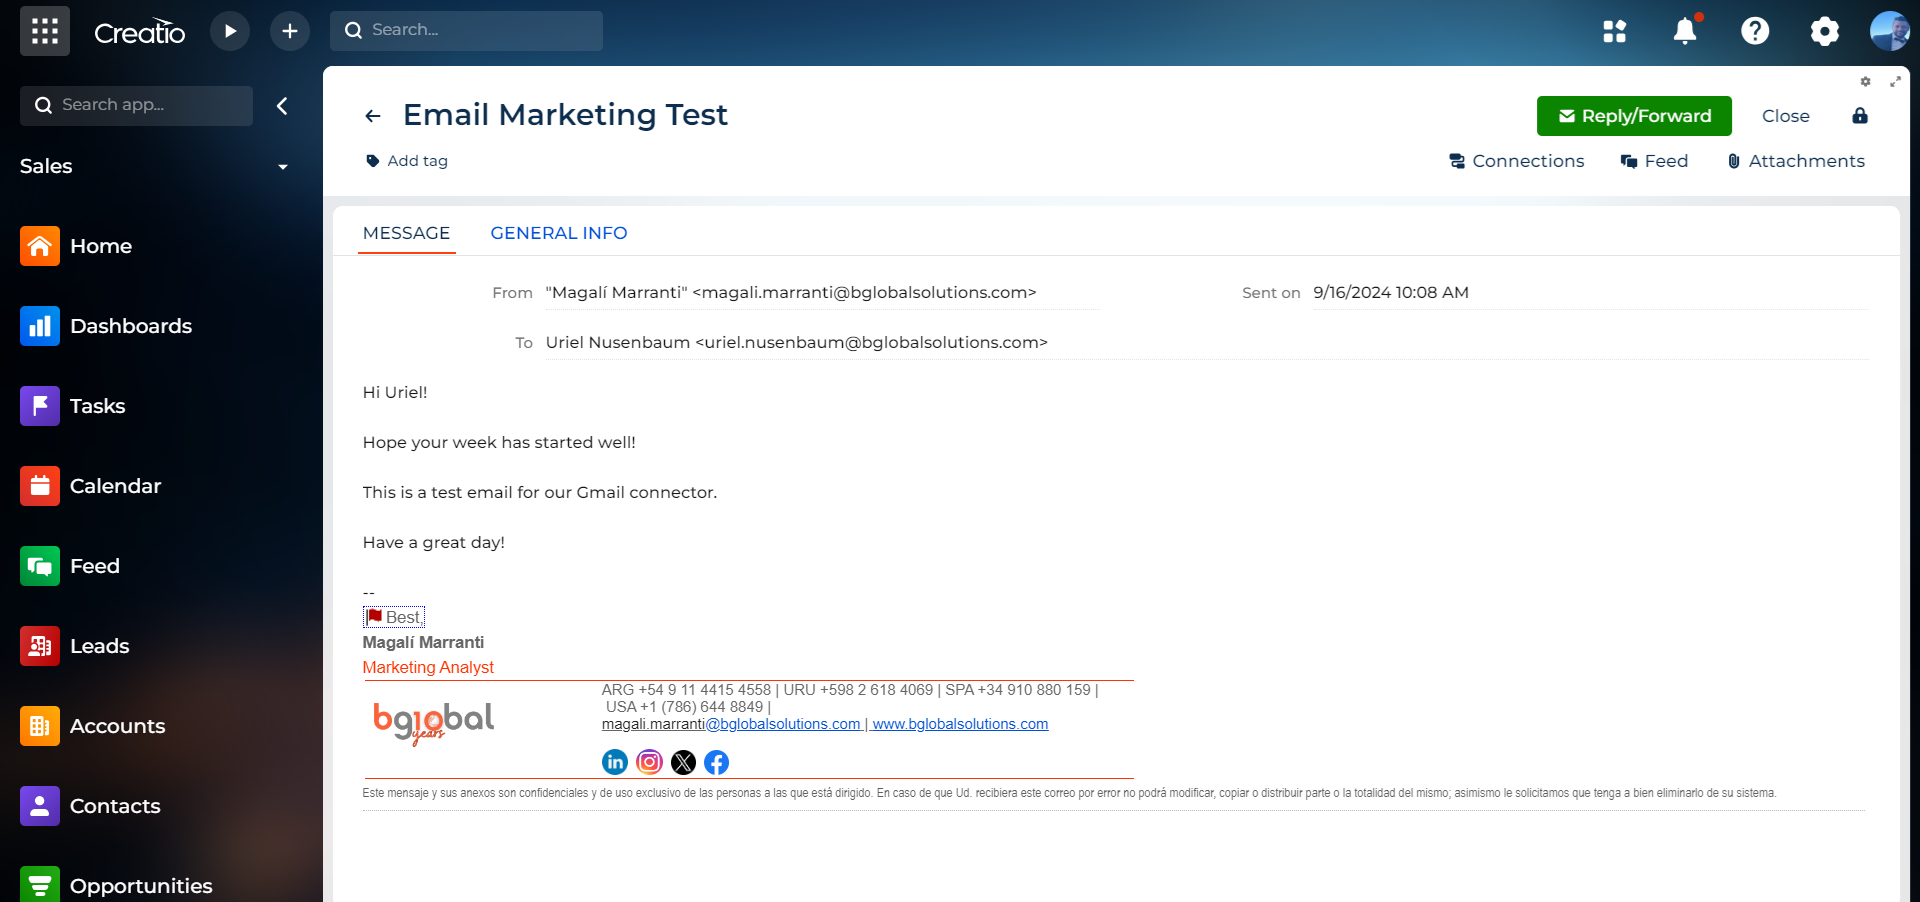
- Send and receive emails and associate them to Contact History in Creatio for all Contacts included in an email (To, From, CC, CCO).
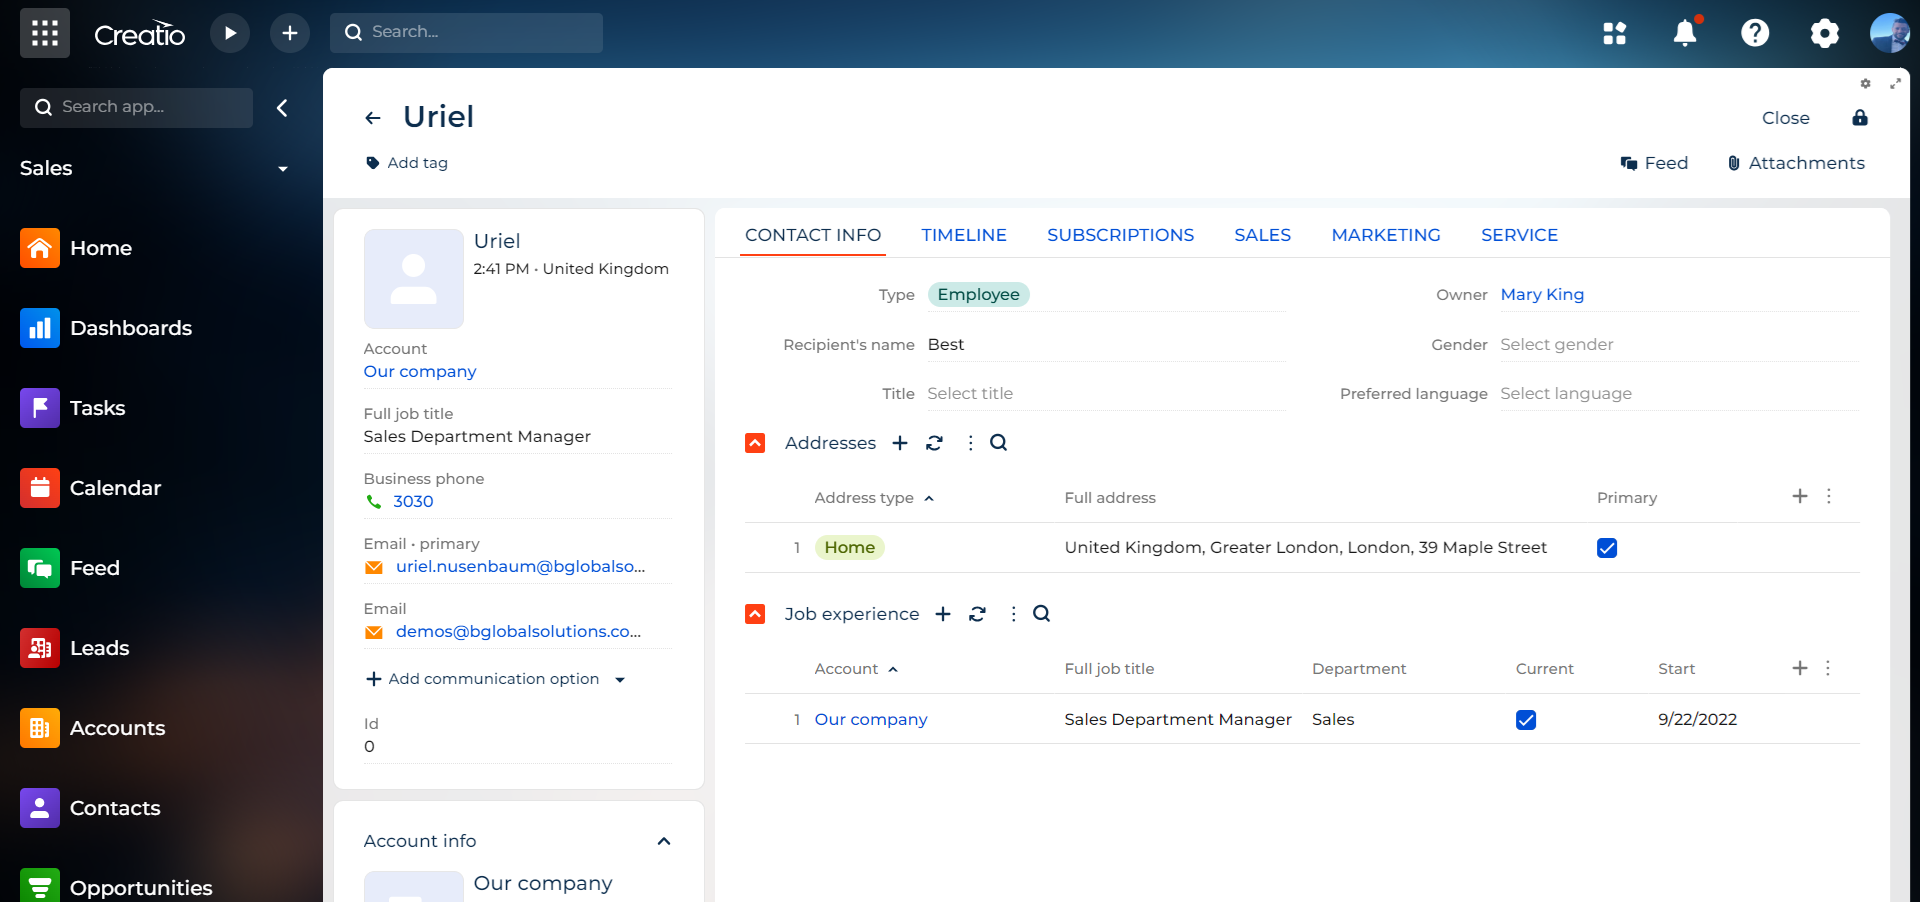
- Click on the selected email in Gmail and open a linked Contact or Account in Creatio.
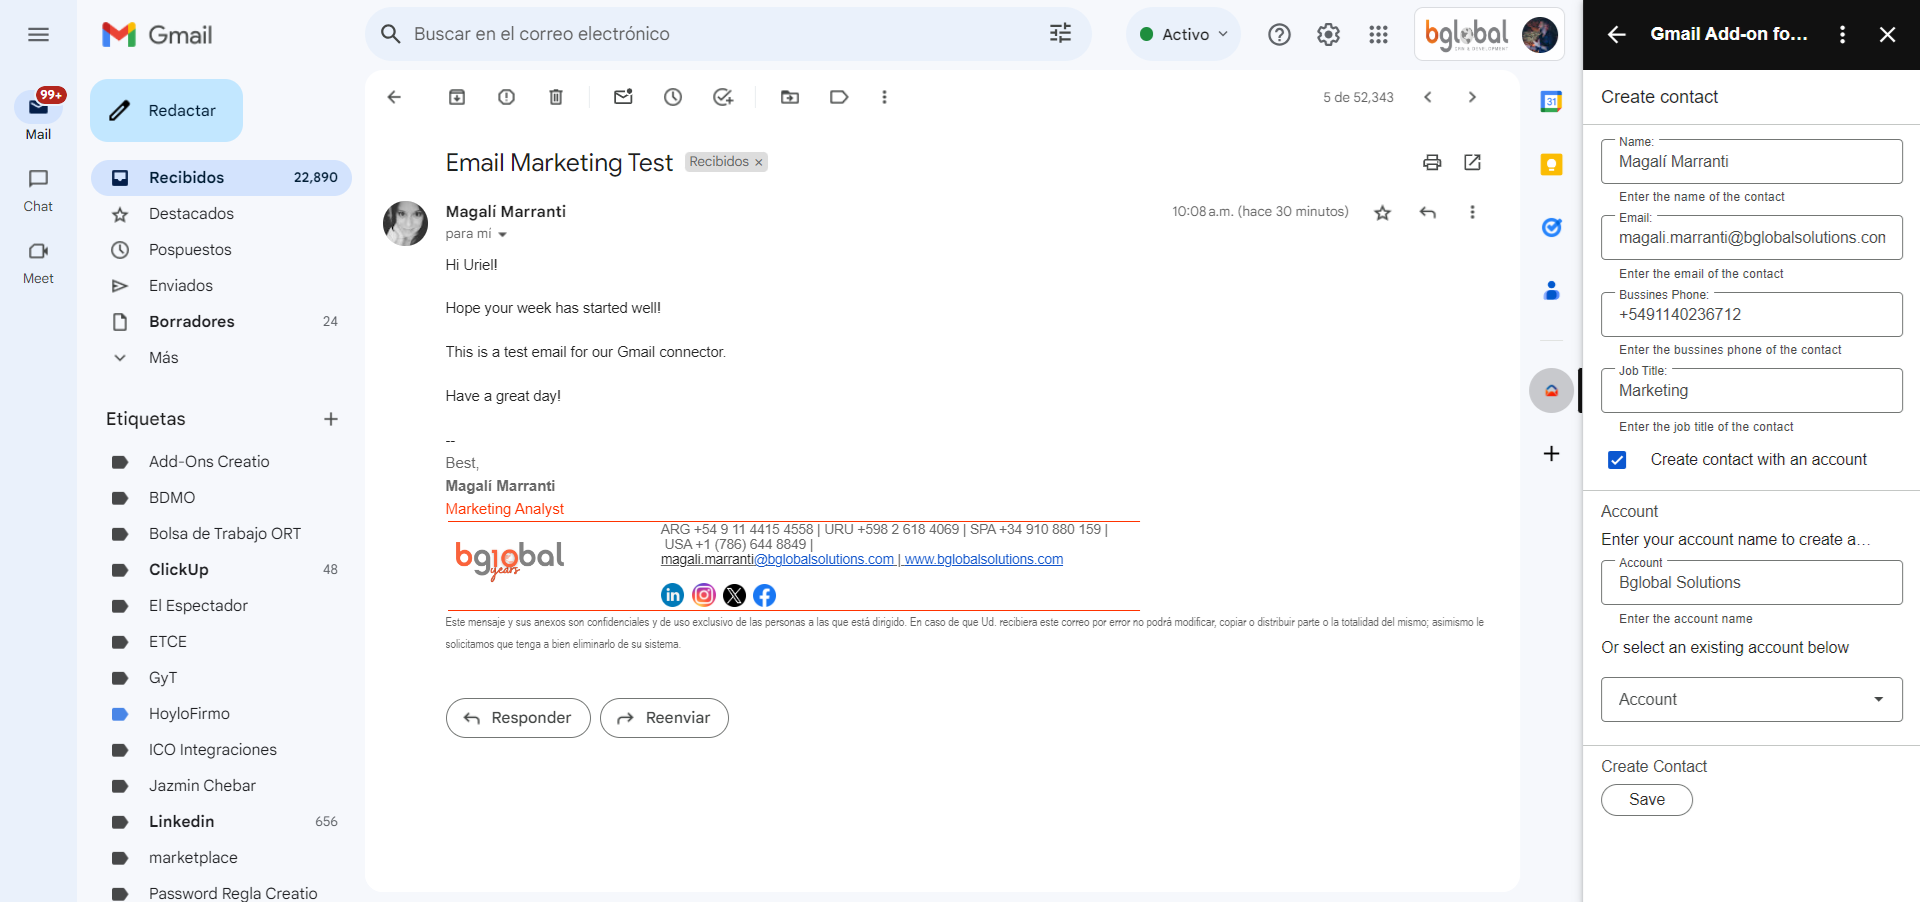
- Create a new Contact with Account into Creatio or add a contact to an existing Account.
Notes:
The extension works with Cloud and On-site versions of Creatio.An active Gmail account in Google is required to use this connector.
For more information, visit: https://bglobalsolutions.com/gmail-add-on/
Pricing
Terms and Conditions
Support
Installation
Setup guide
STEP 1: Gather the Necessary Information
To get started with Gmail Add-on for Creatio, you’ll need a few key pieces of information:
-A Key for usage (request API key from BGlobal Solutions team).
-The URL of your Creatio platform.
-Your username and password for the platform.
Once you have this information, you’re ready to start configuring the connector and accessing your business data in real time.
STEP 2: Install the Connector
Install the connector into your Gmail Account from Google Marketplace.
STEP 3: Give the Connector Access to your Google Account
Gmail requires you to give a third party access to read and access your emails.
STEP 4: Connect your Google Account
Your Google Account is used to store all the Creatio instances.
STEP 5: Fill the Information
Enter the credentials gathered in the previous step:
Remember the url must have the "https://" property.
You can test the connection before adding it.
STEP 6: Use the Connector
Open any email to start using the connector and all the relevant information will be available.
*When the user clicks the back arrow, the "Cancel" and "View" buttons will appear as part of the native interface. Under normal navigation, the current instance will be displayed. If the user selects "Cancel," they will stay on the current screen. If they select "View," they will return to the email details.
Data sharing
- By installing or downloading the App, you confirm that you agree with sharing your account data (name, email, phone, company and country) with the App Developer as their End User.
- The App Developer will process your data under their privacy policy.
Versions
Manual app installation
- Open the needed app → the Packages tab - download the Markeplace app files.
- Click in the top right → Application Hub
- Click New application. This opens a window.
- Select Install from file and click Select in the window that opens.
- Click Select file on the page of the Marketplace App Installation Wizard and specify the app file path.
The minimum annual purchase volume per customer is at least 10 licenses.
An active Gmail account in Google is required to use this connector.