Talkdesk connector for Creatio
Overview

Product overview
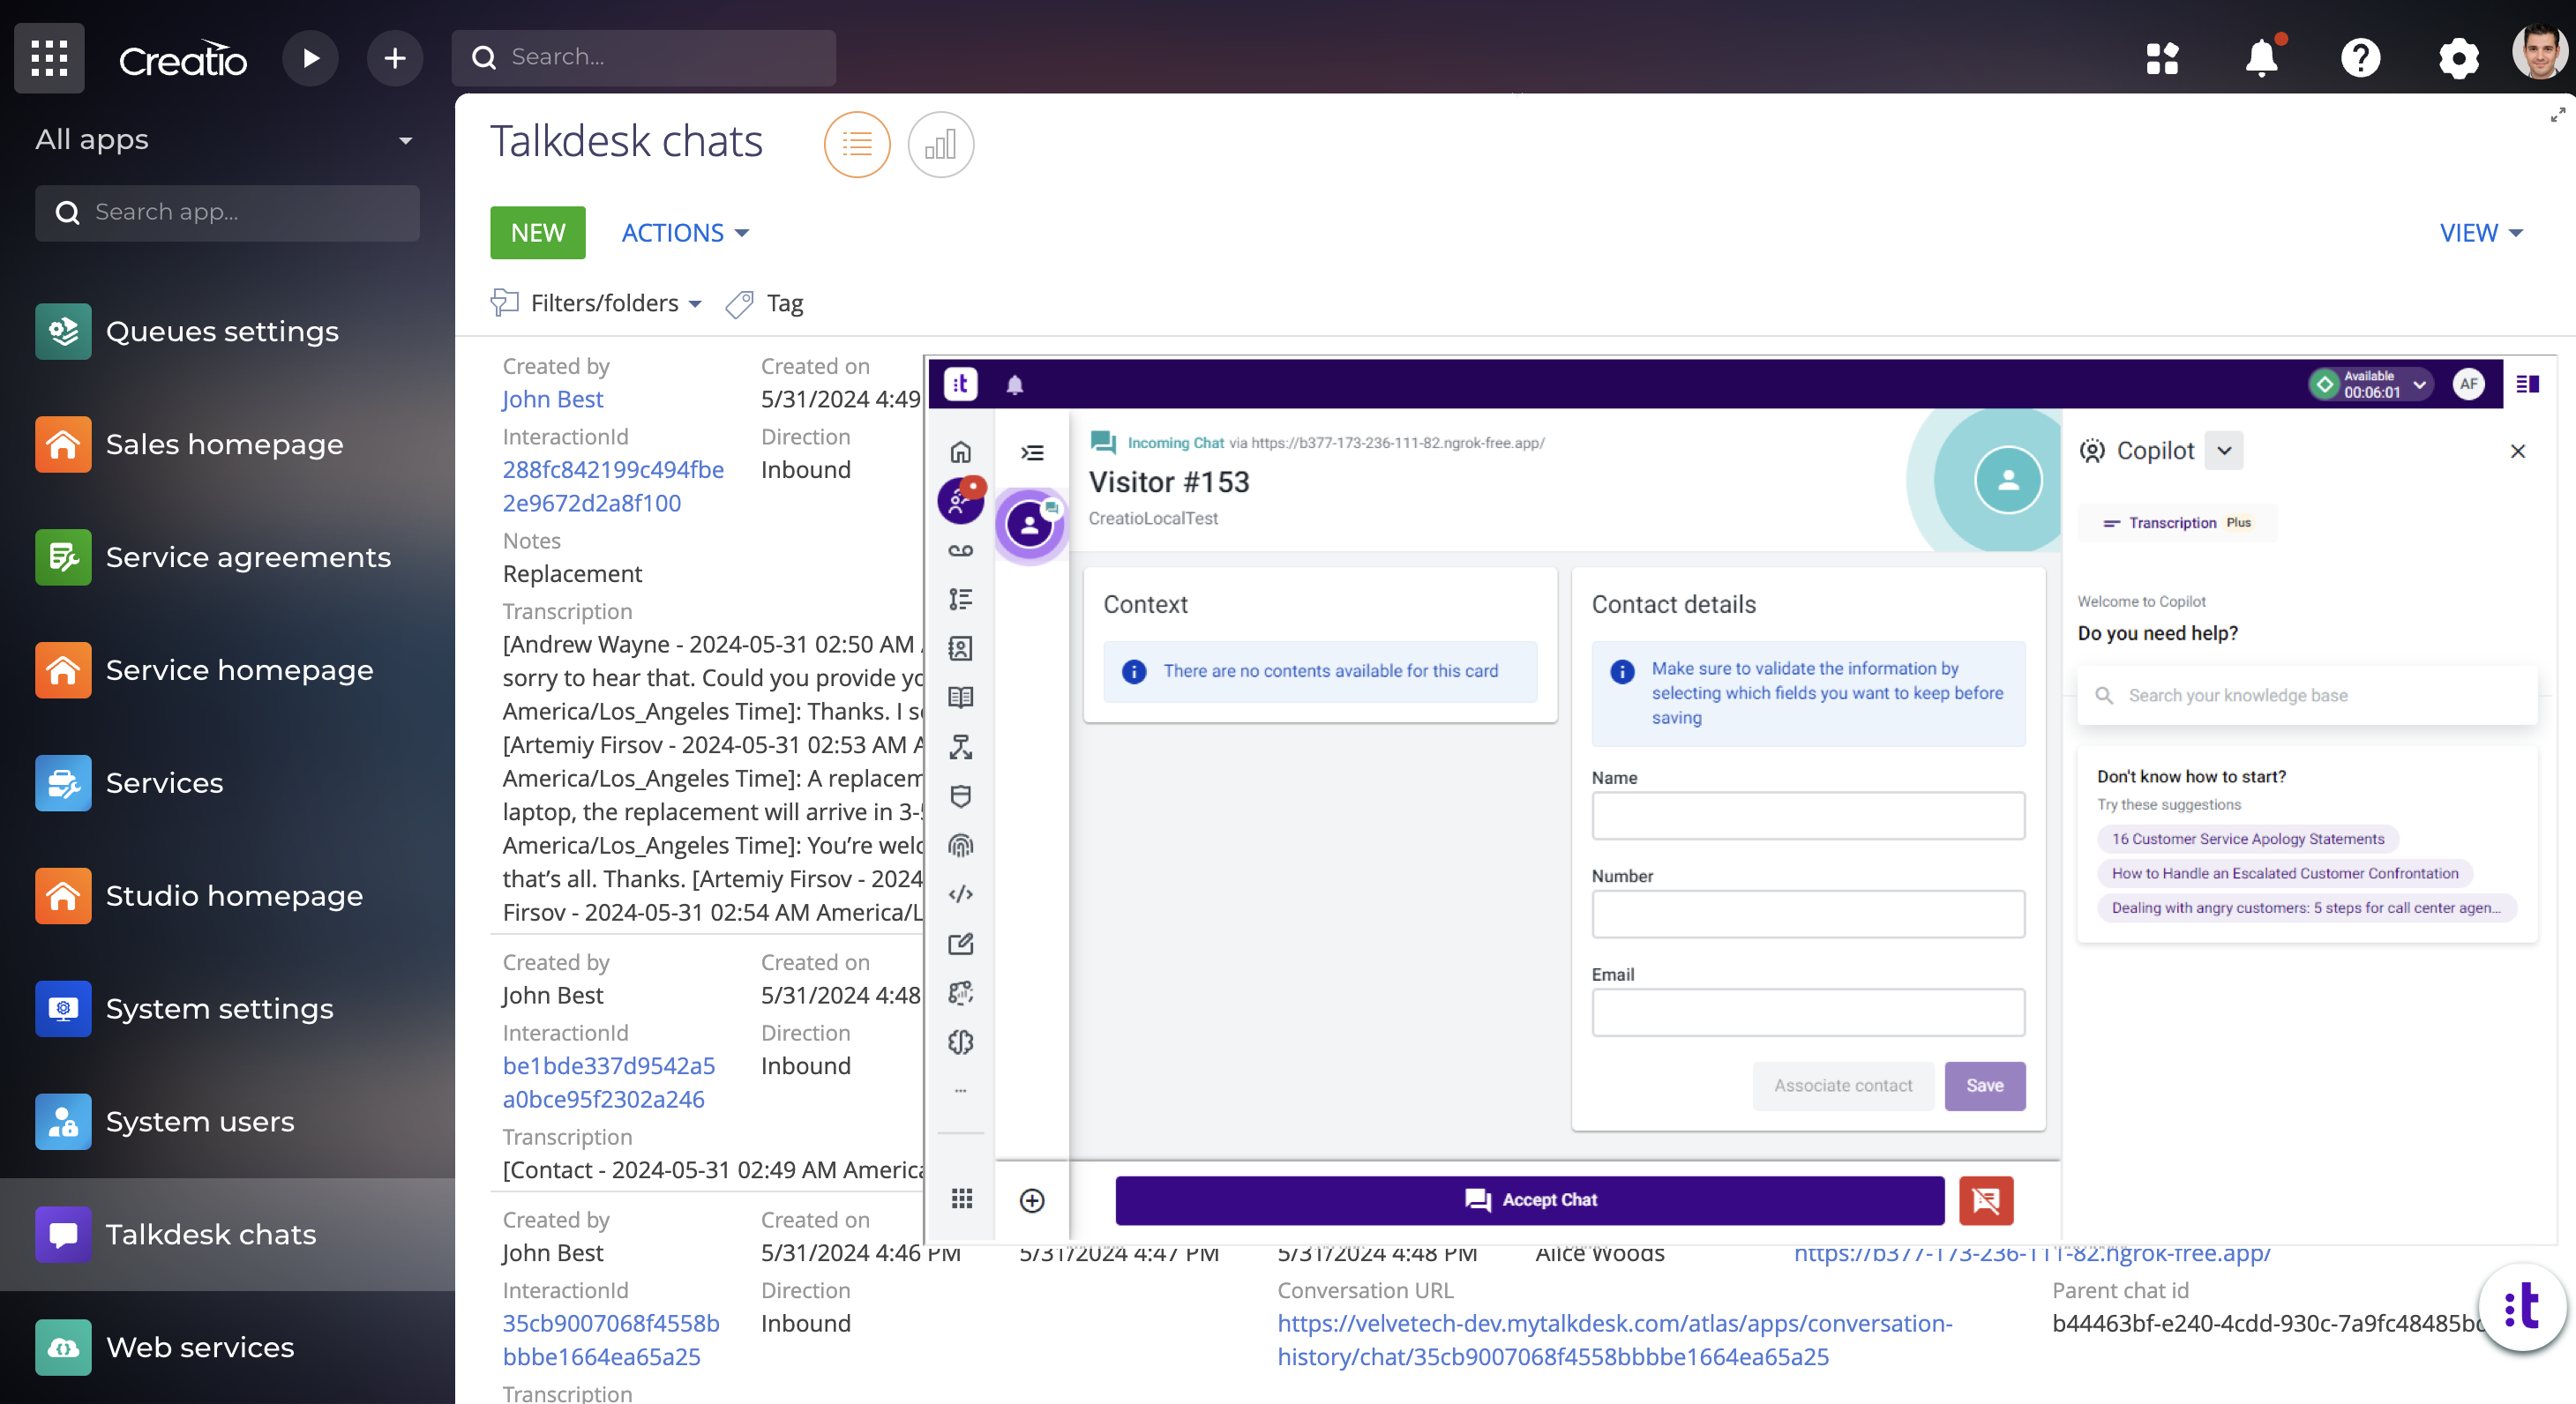
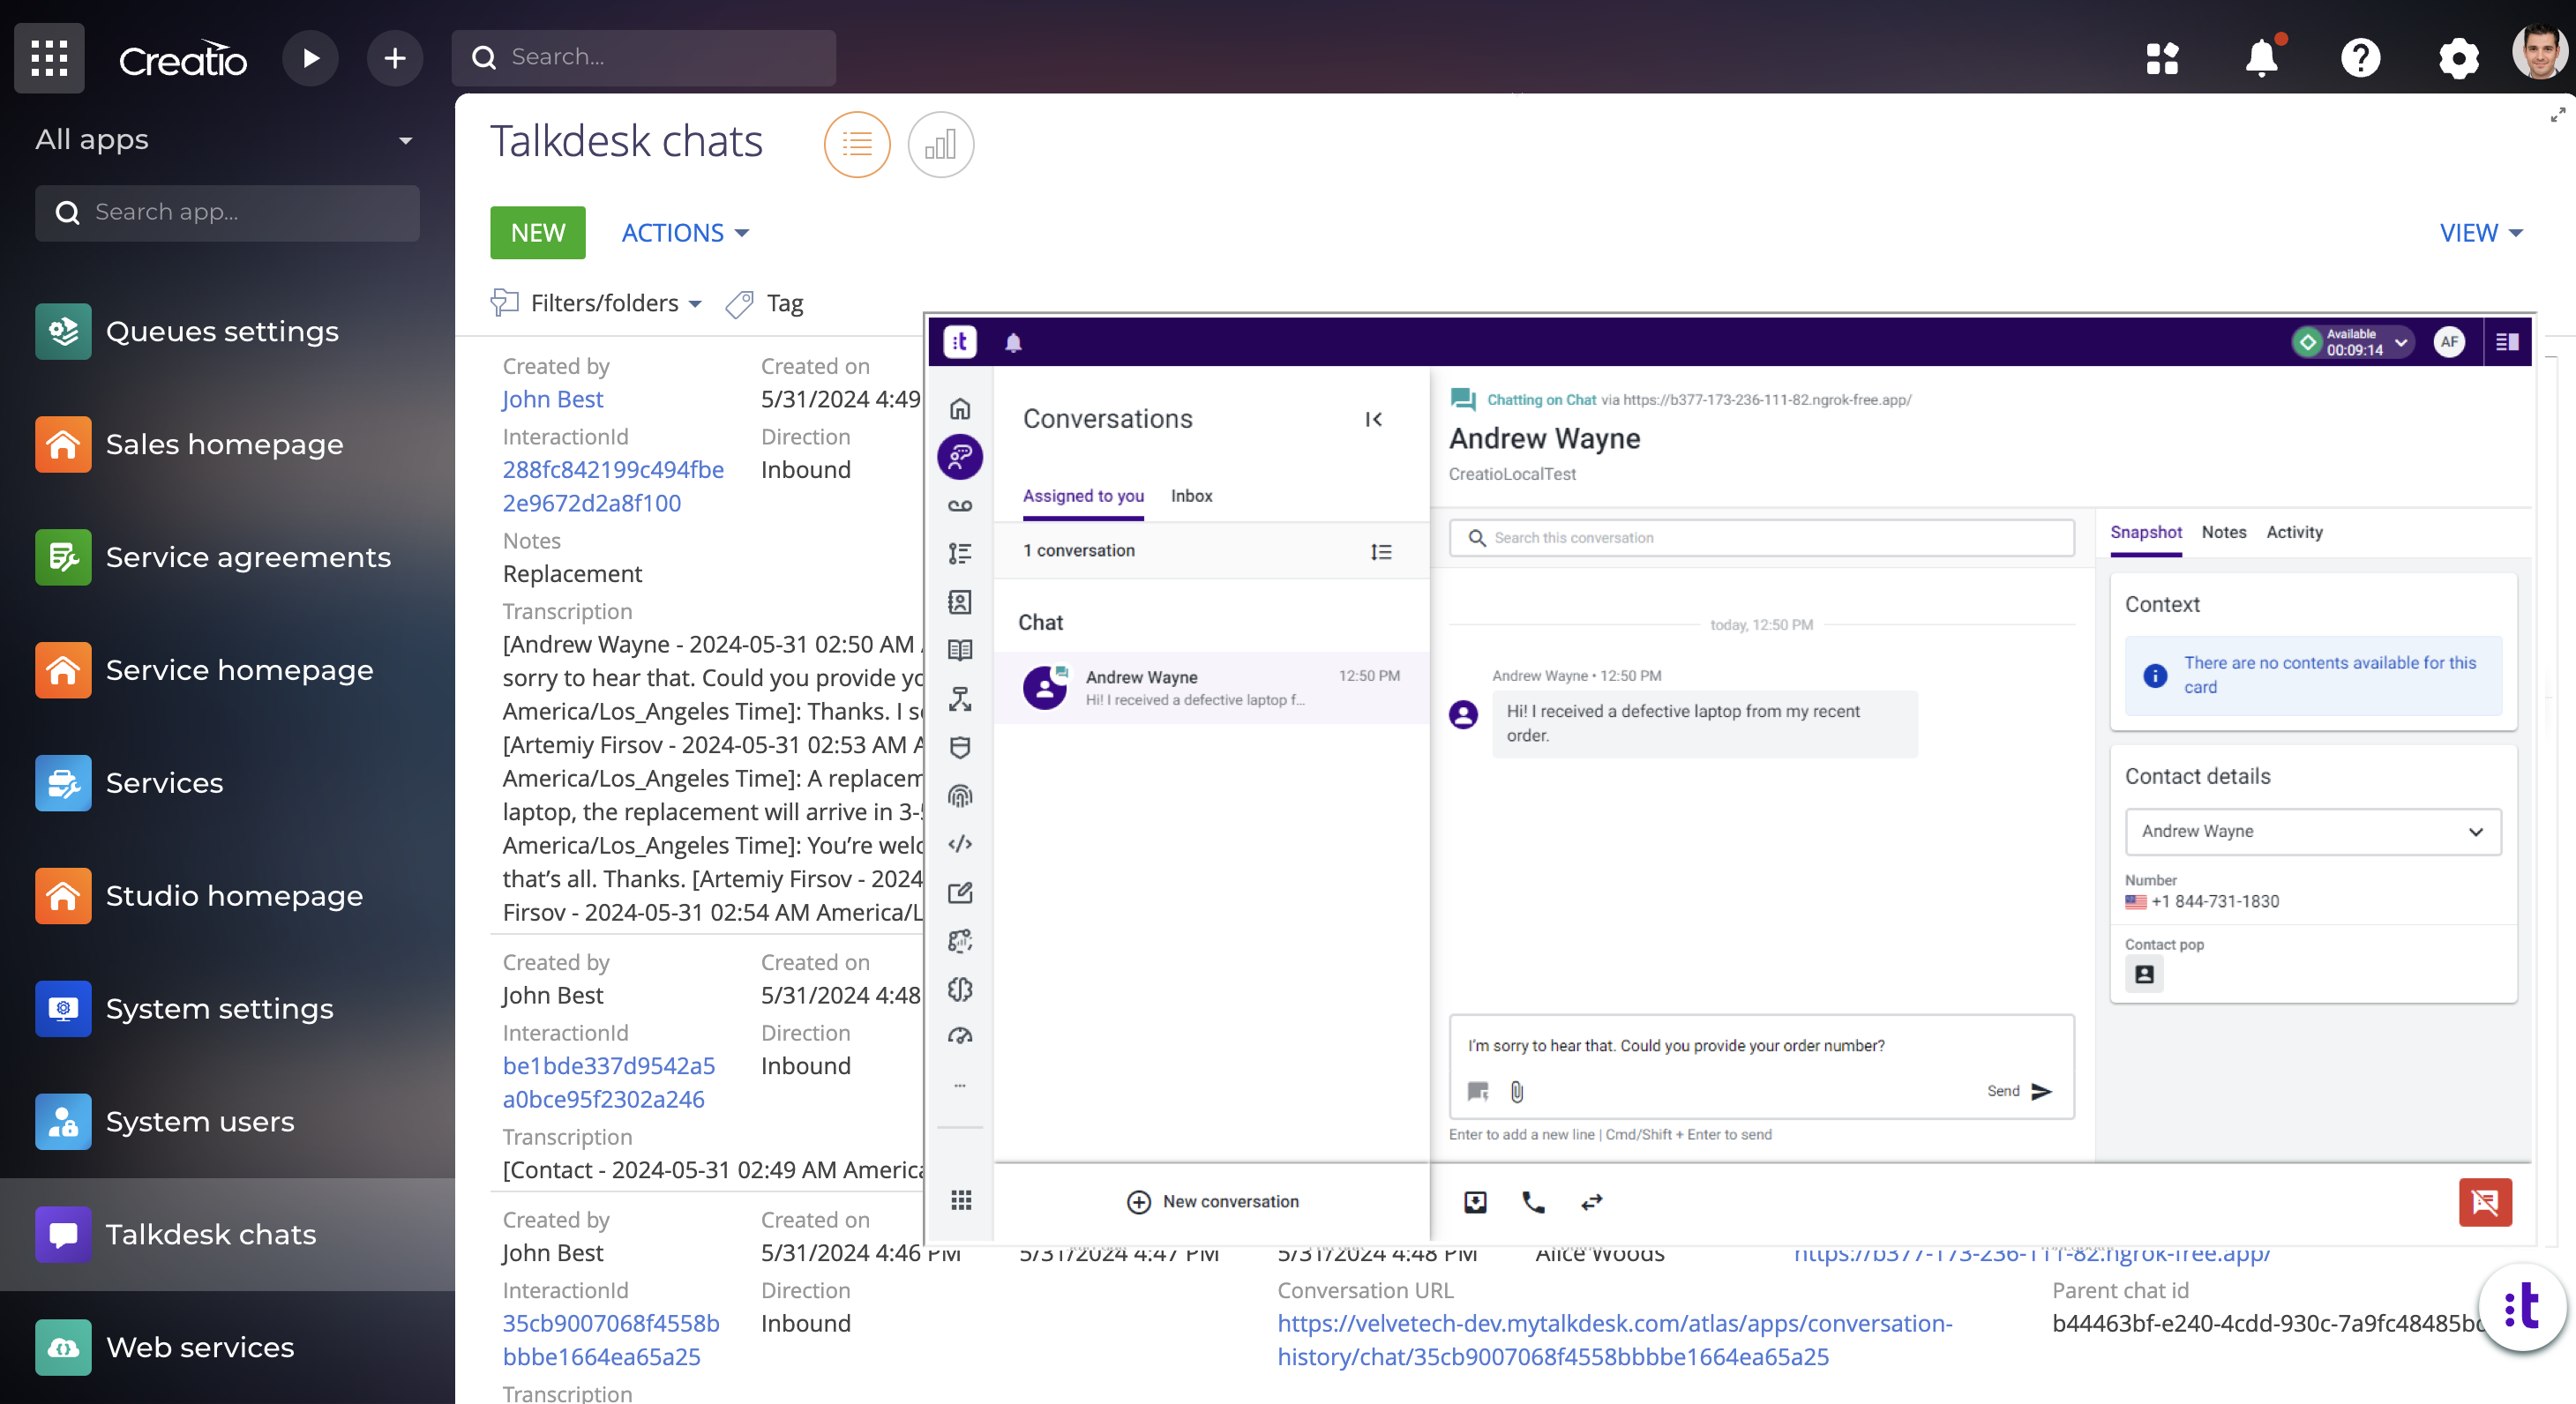
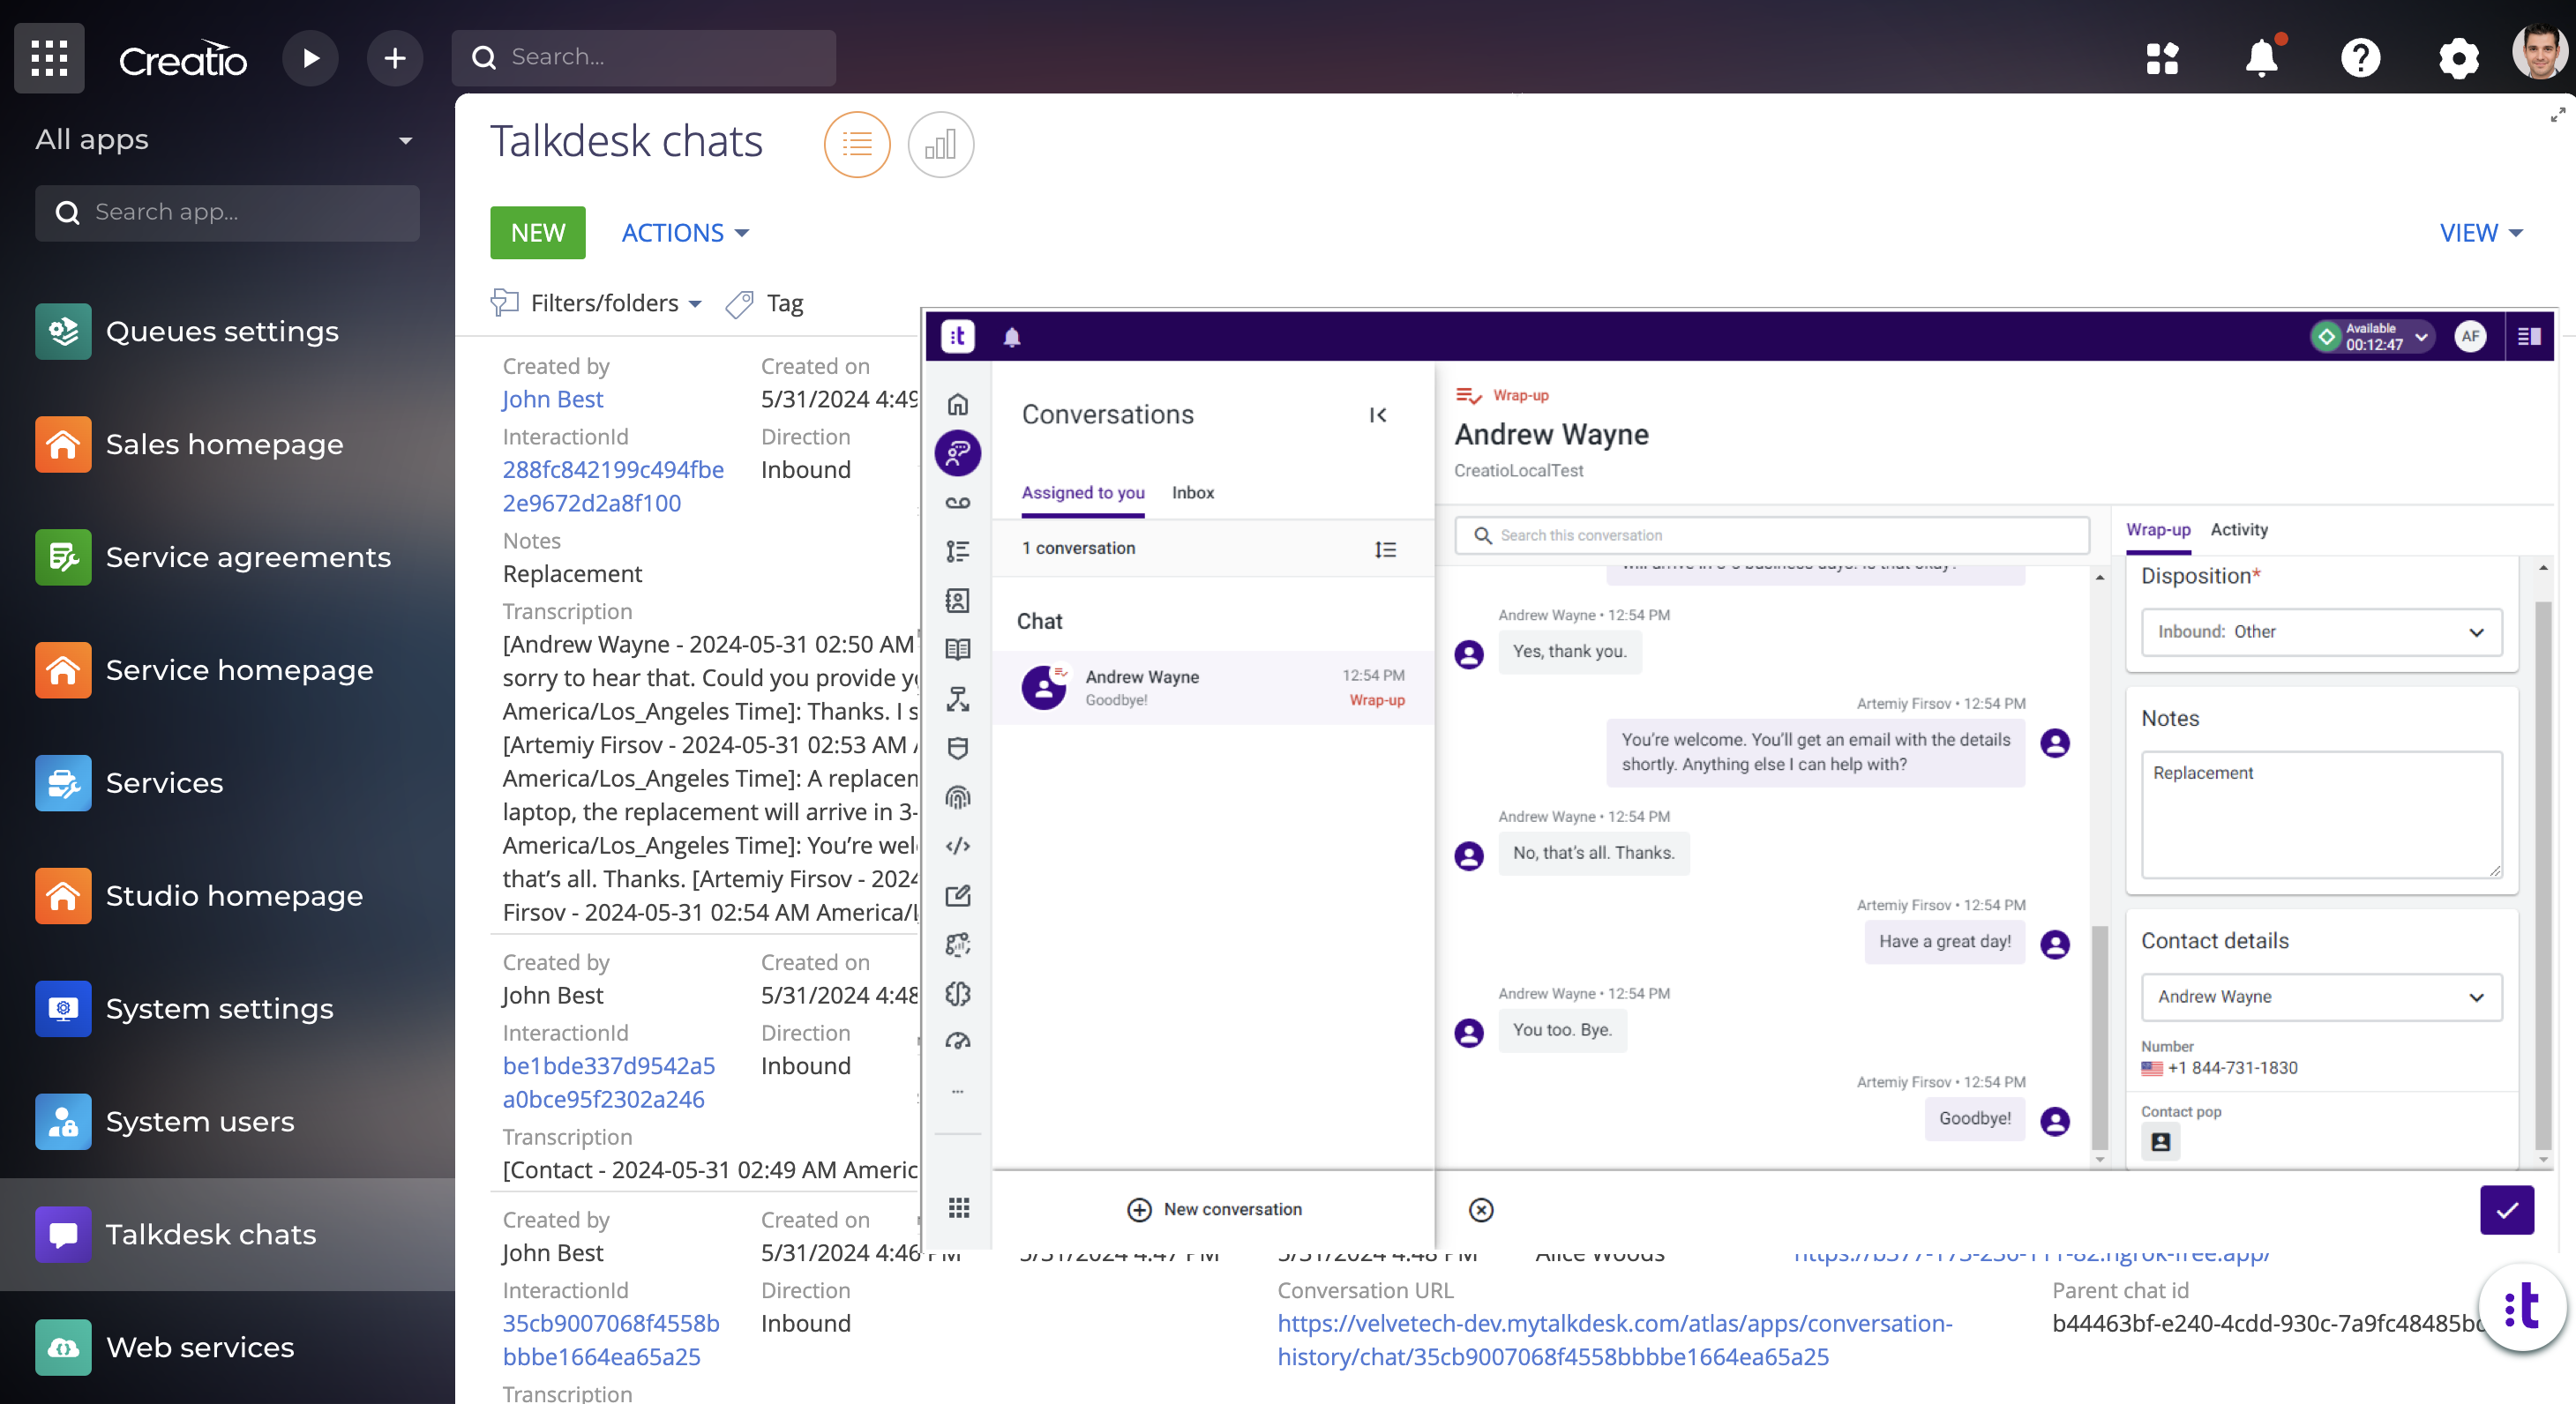
Talkdesk connector for Creatio allows you to access Talkdesk Agent Workspace in the Creatio UI and effectively communicate with clients and colleagues while keeping all communication history logged in one place.
Use cases:
-
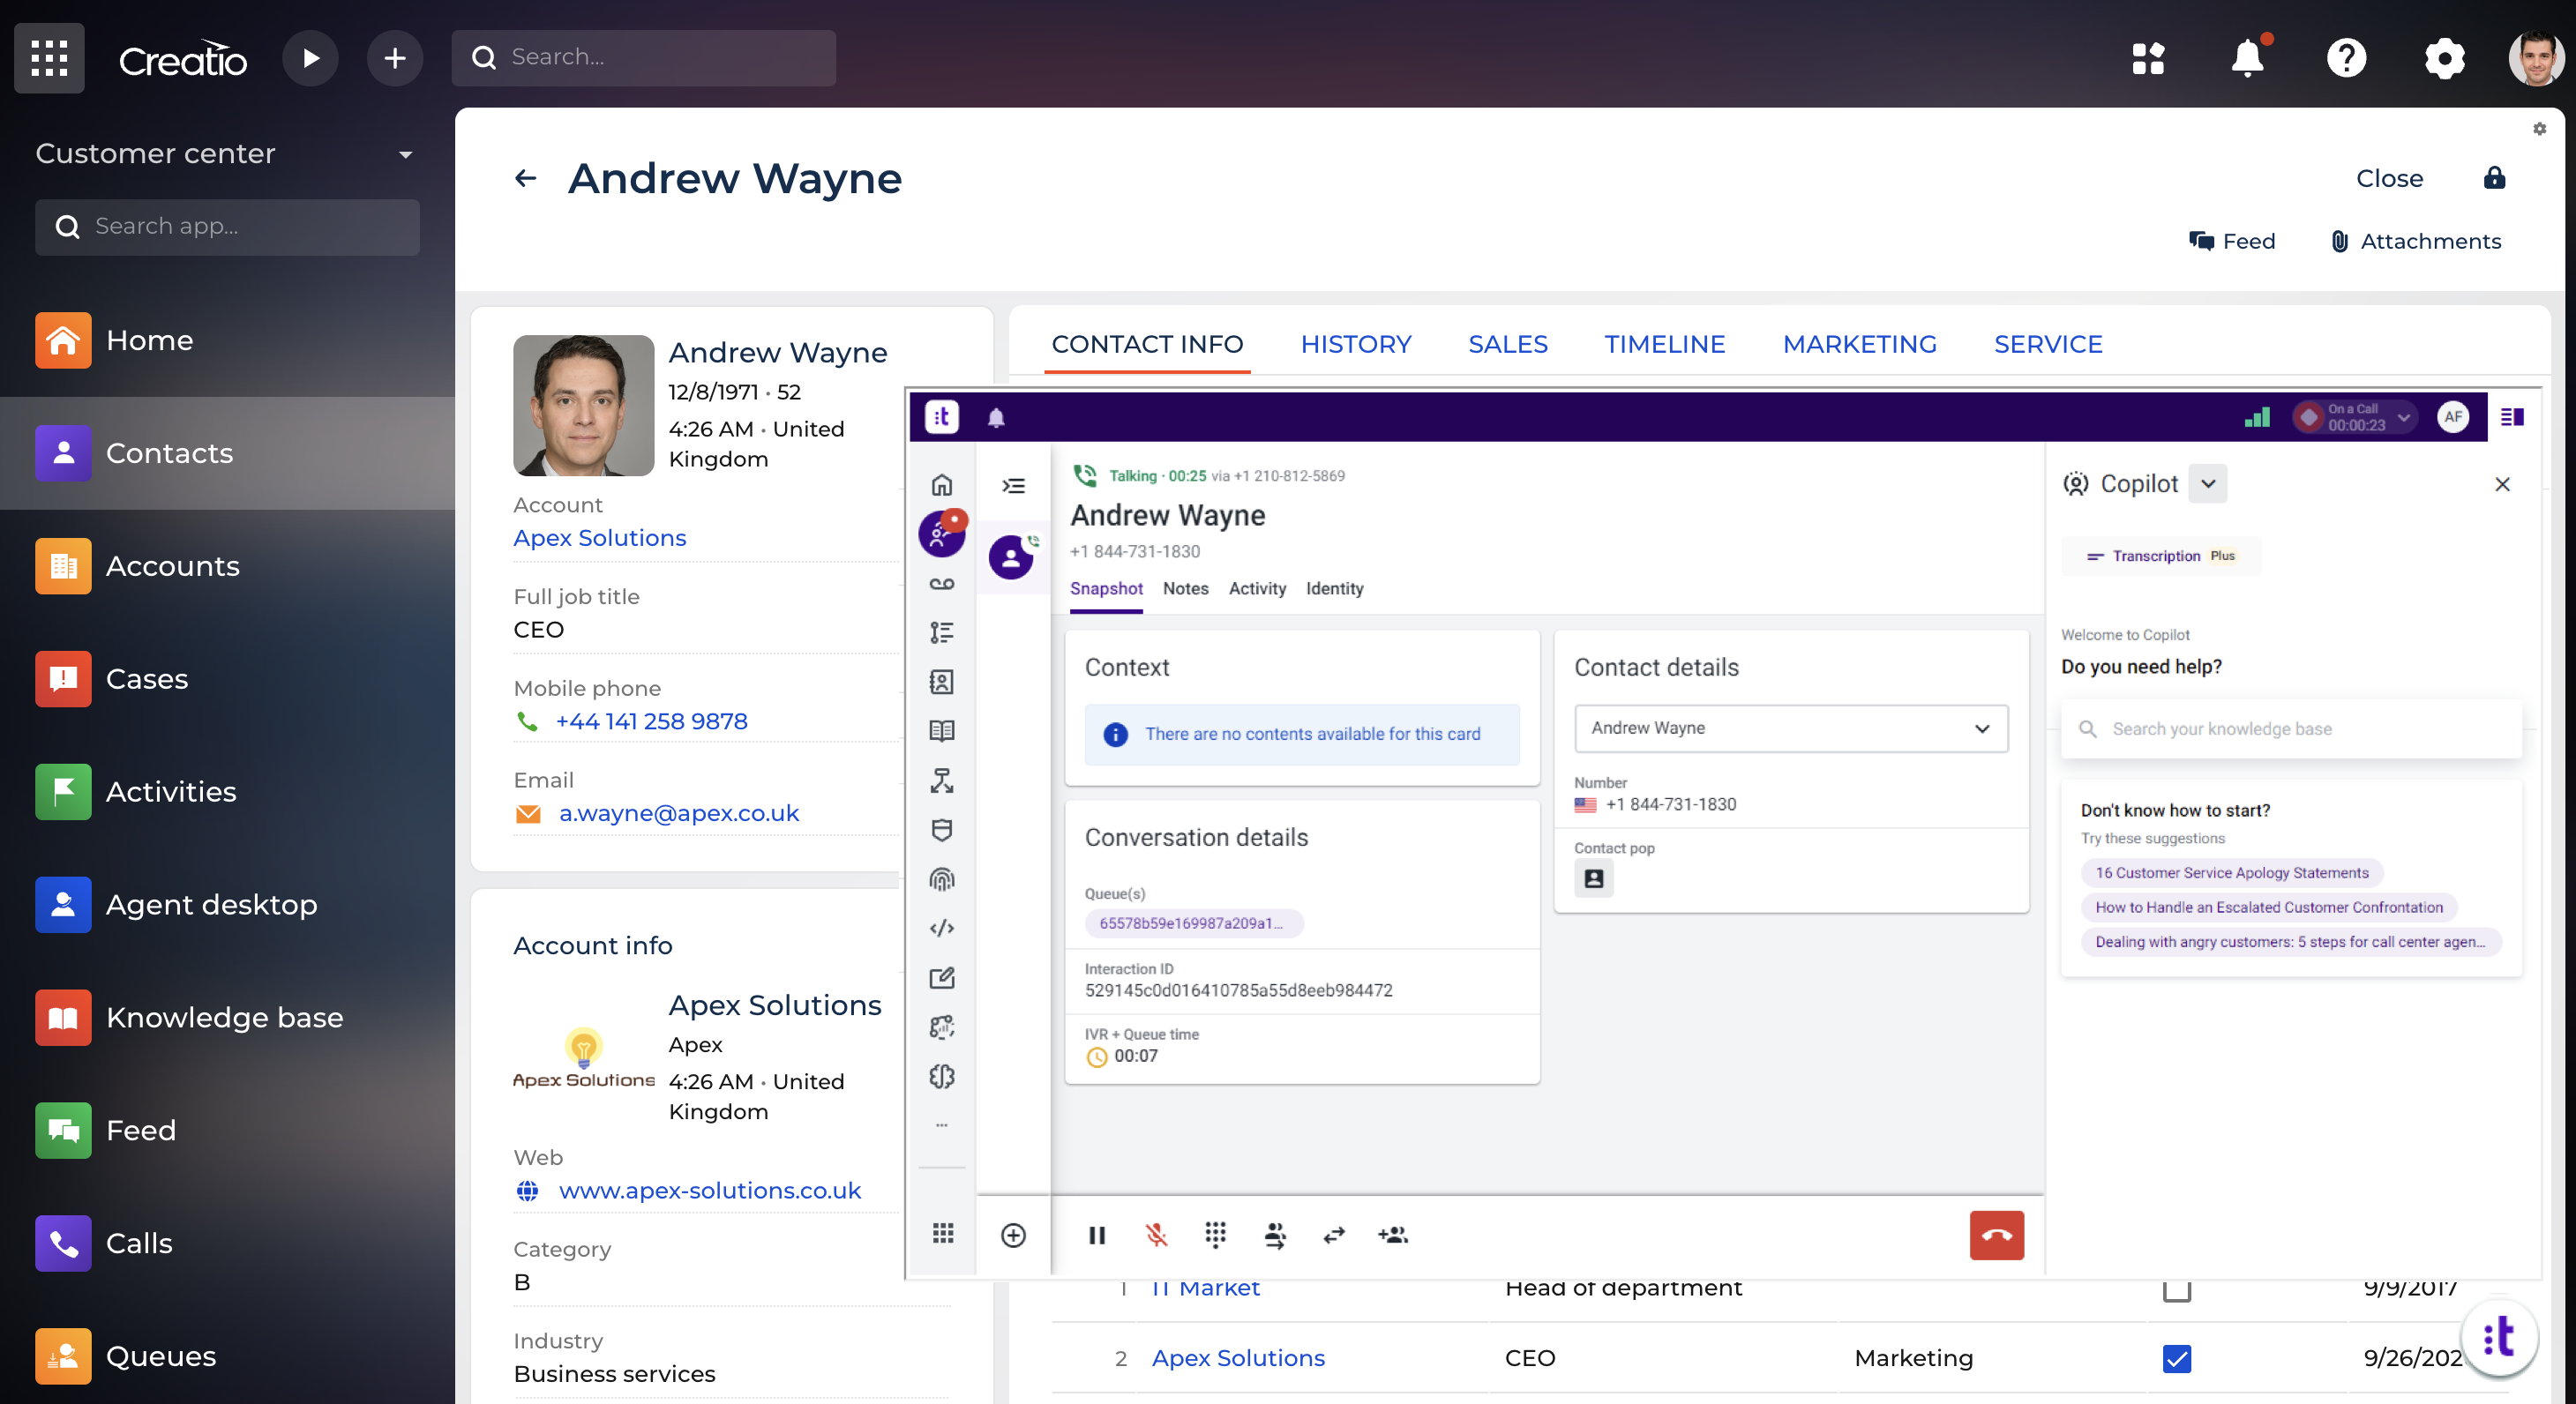
Call management – the connector allows Creatio users to make inbound and outbound calls using the Talkdesk cloud contact center system. During the call, an agent can access all information about the Contact, including the history of previous communications.
-
Call analytics – analyze the quality of communications with clients based on the number of call attempts and conversations, duration of calls, and call results.
-
Chat management – the connector allows Creatio users to manage live chat conversations using the Talkdesk cloud contact center system. During the chat, an agent can access all information about the Contact, including the history of previous communications.
-
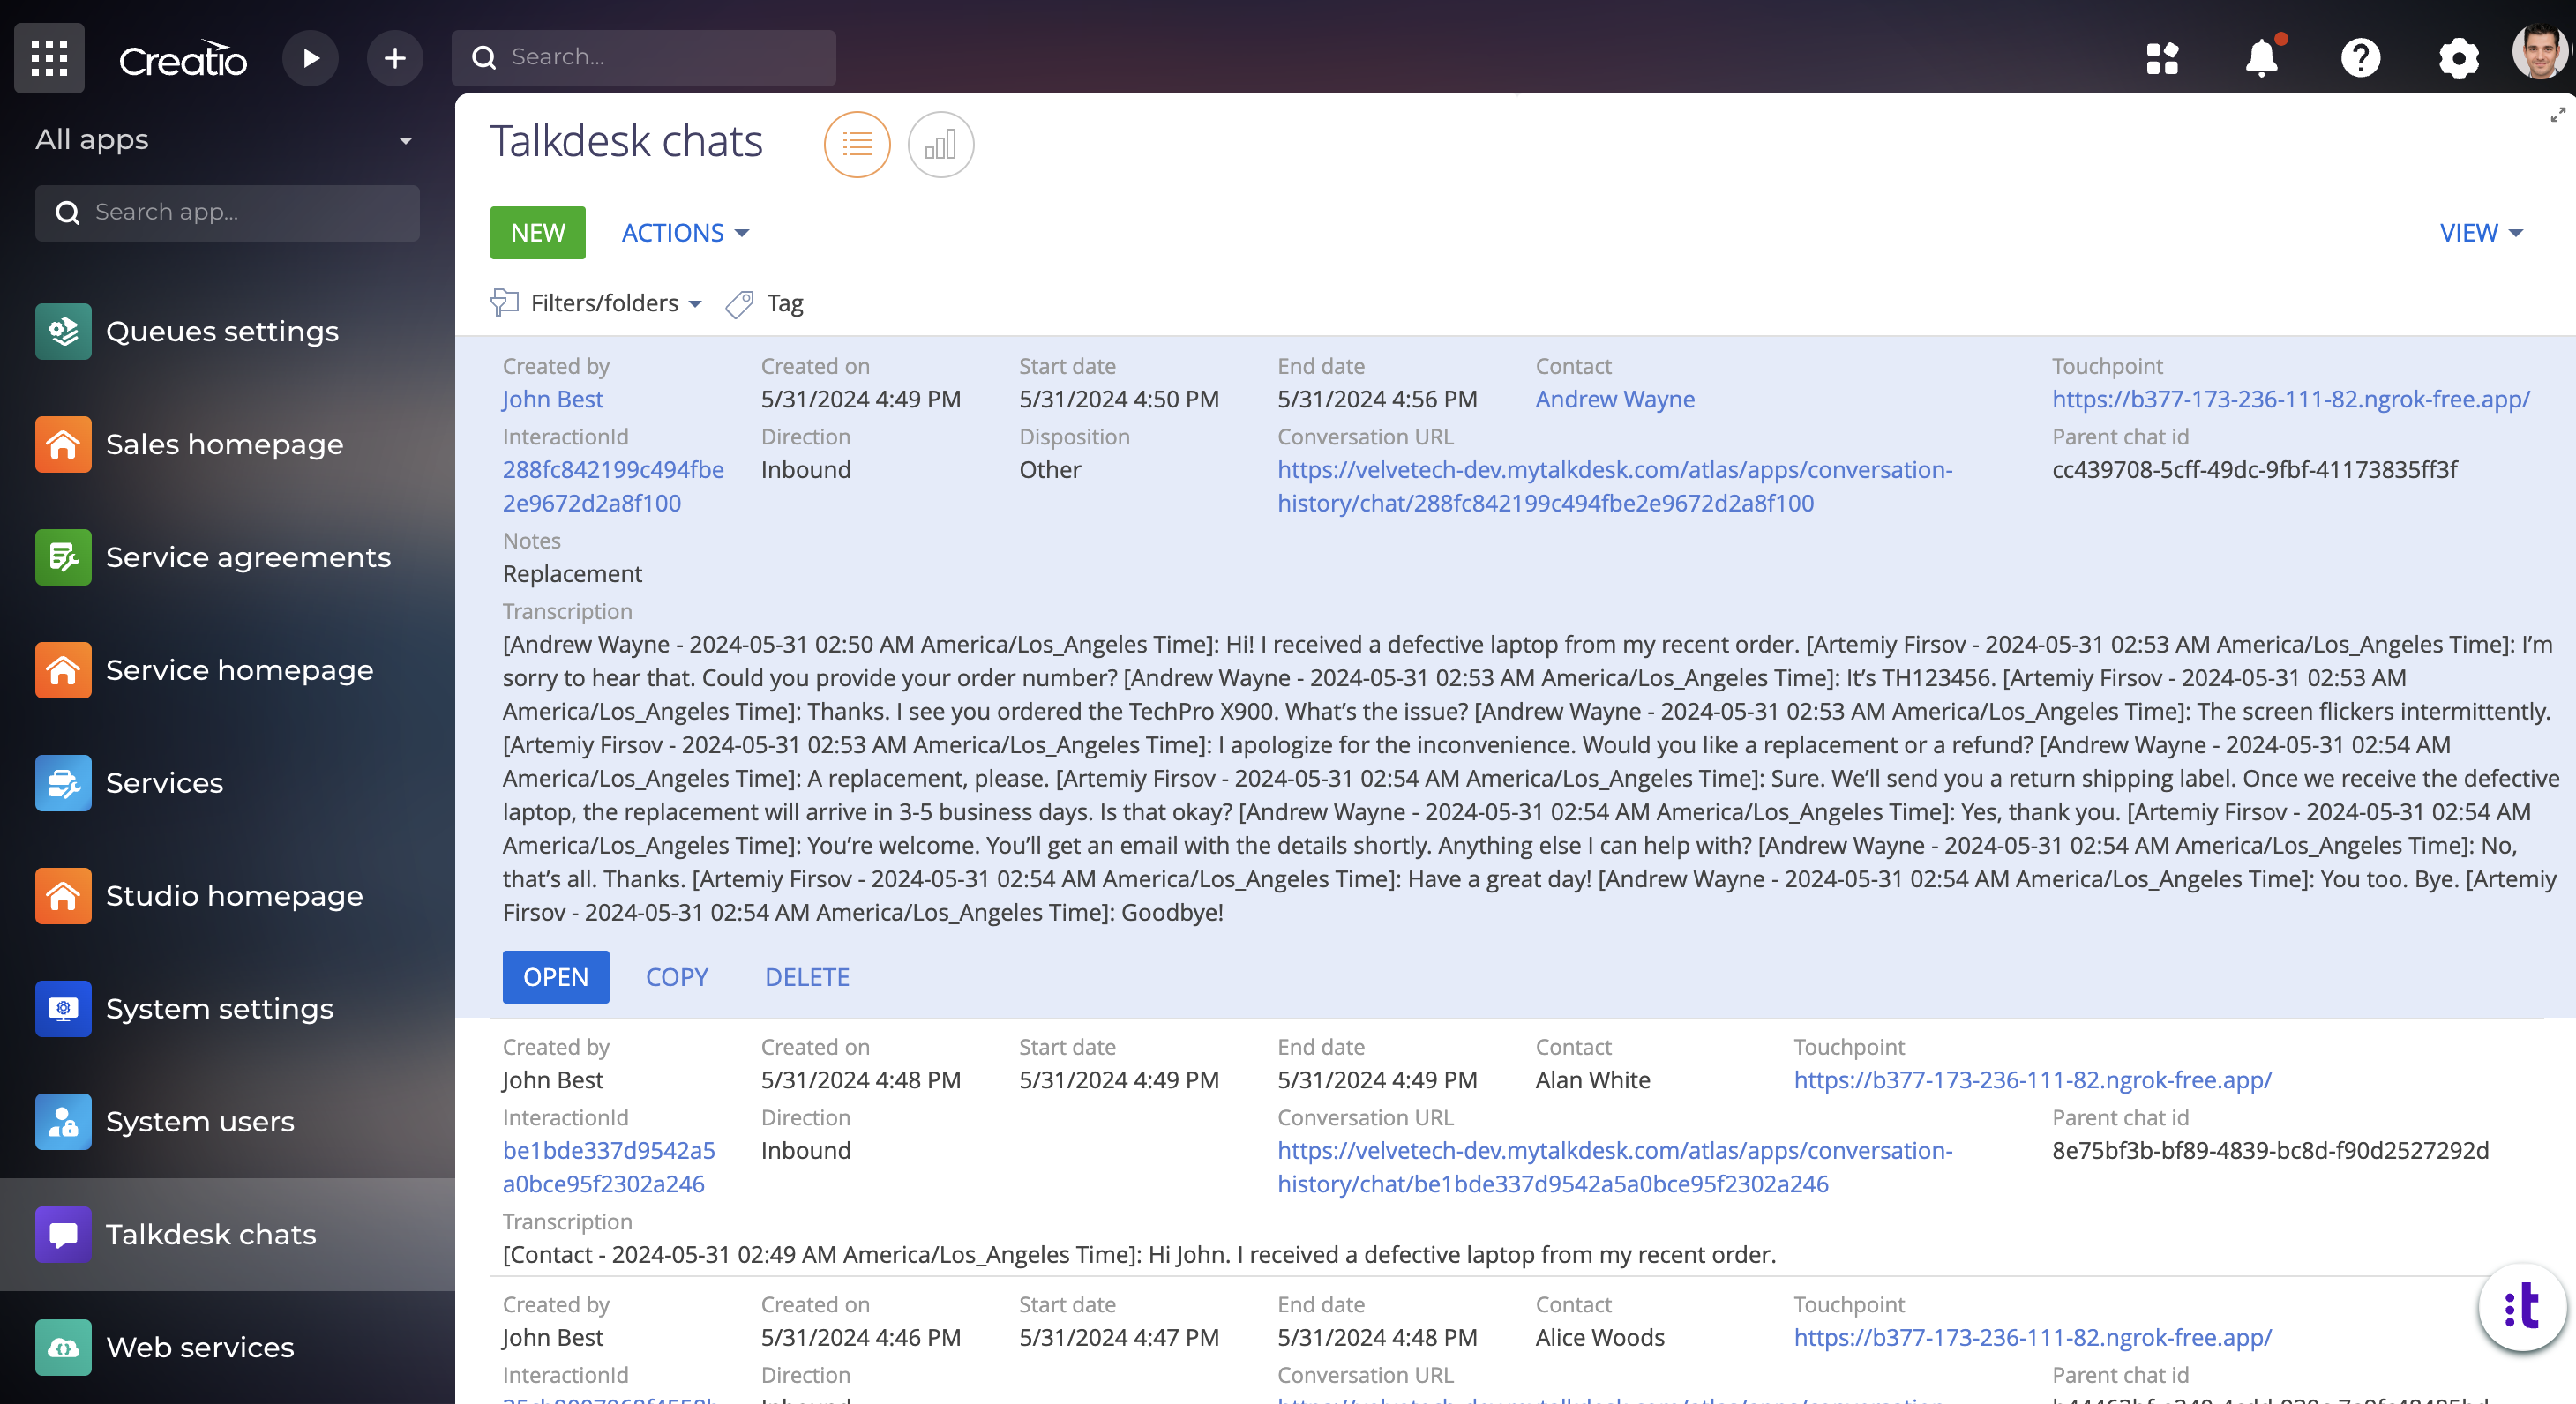
Chat history – access all Talkdesk chat details, including results, timing details, and transcriptions in the Creatio interface.
Voice Features:
-
Make outgoing calls and accept incoming calls in Creatio
-
Put a call on hold
-
Transfer a call to another phone number
-
Identify a Contact and Account by a phone number
-
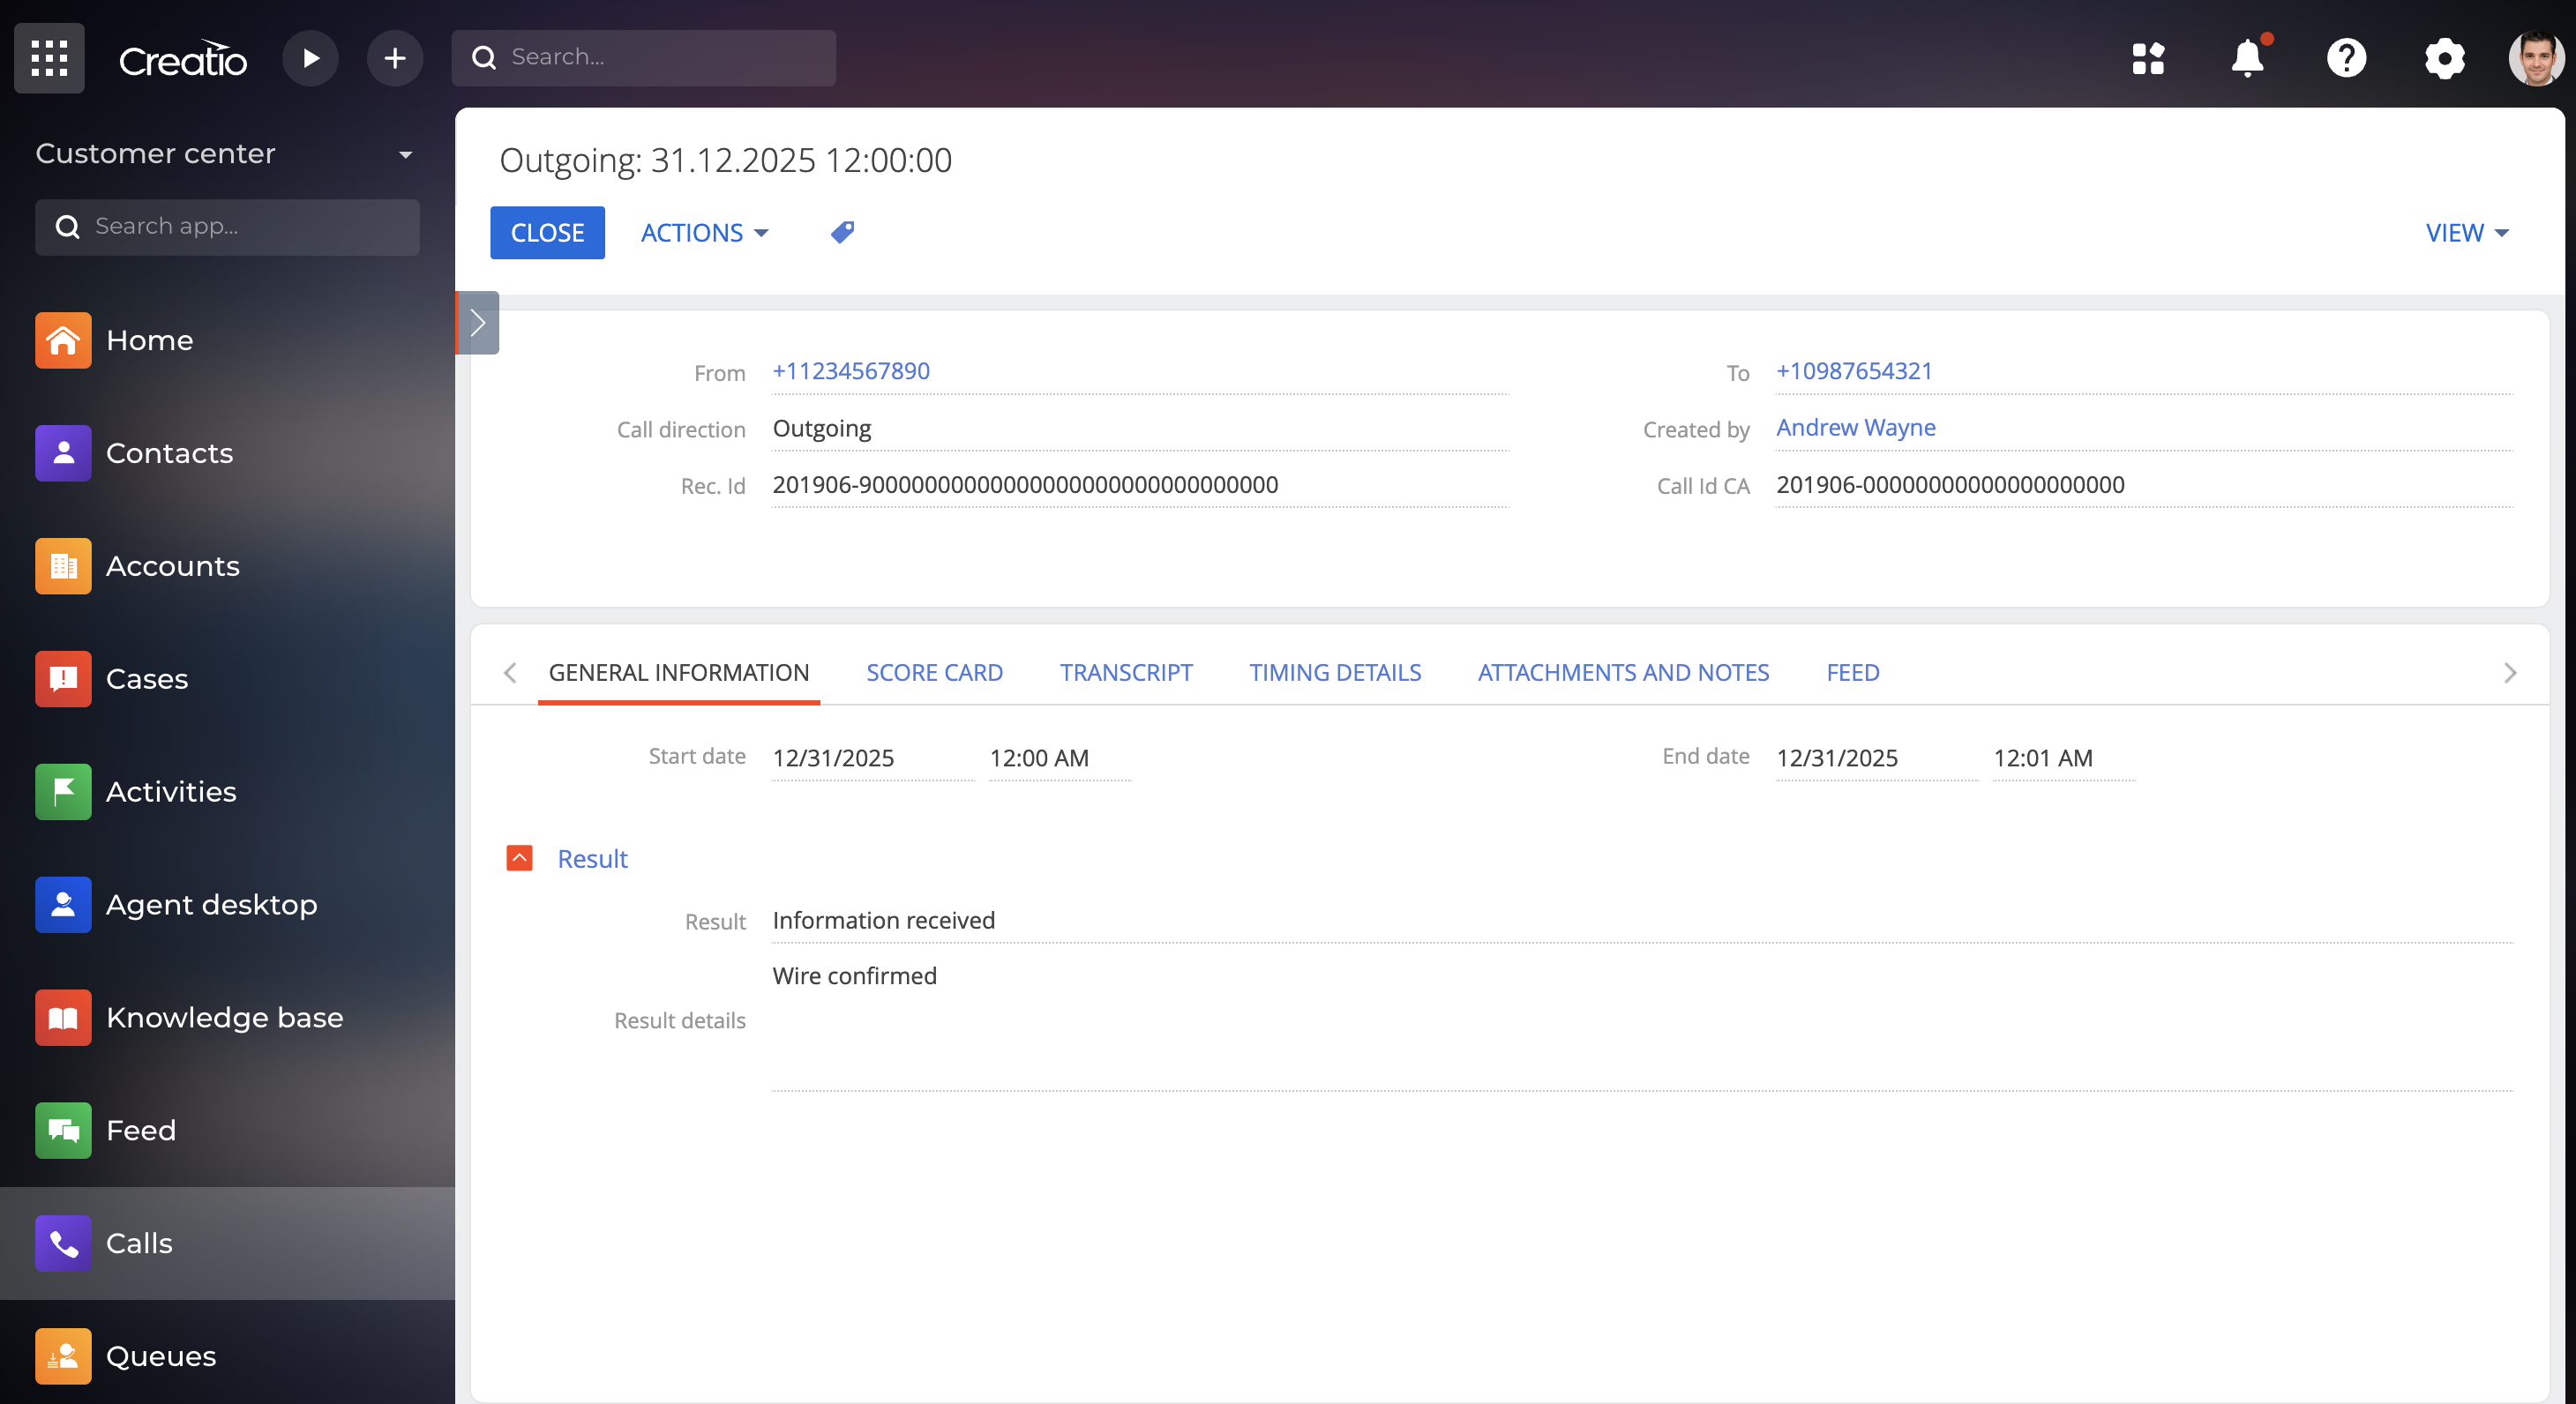
Access an entire call history with a client
-
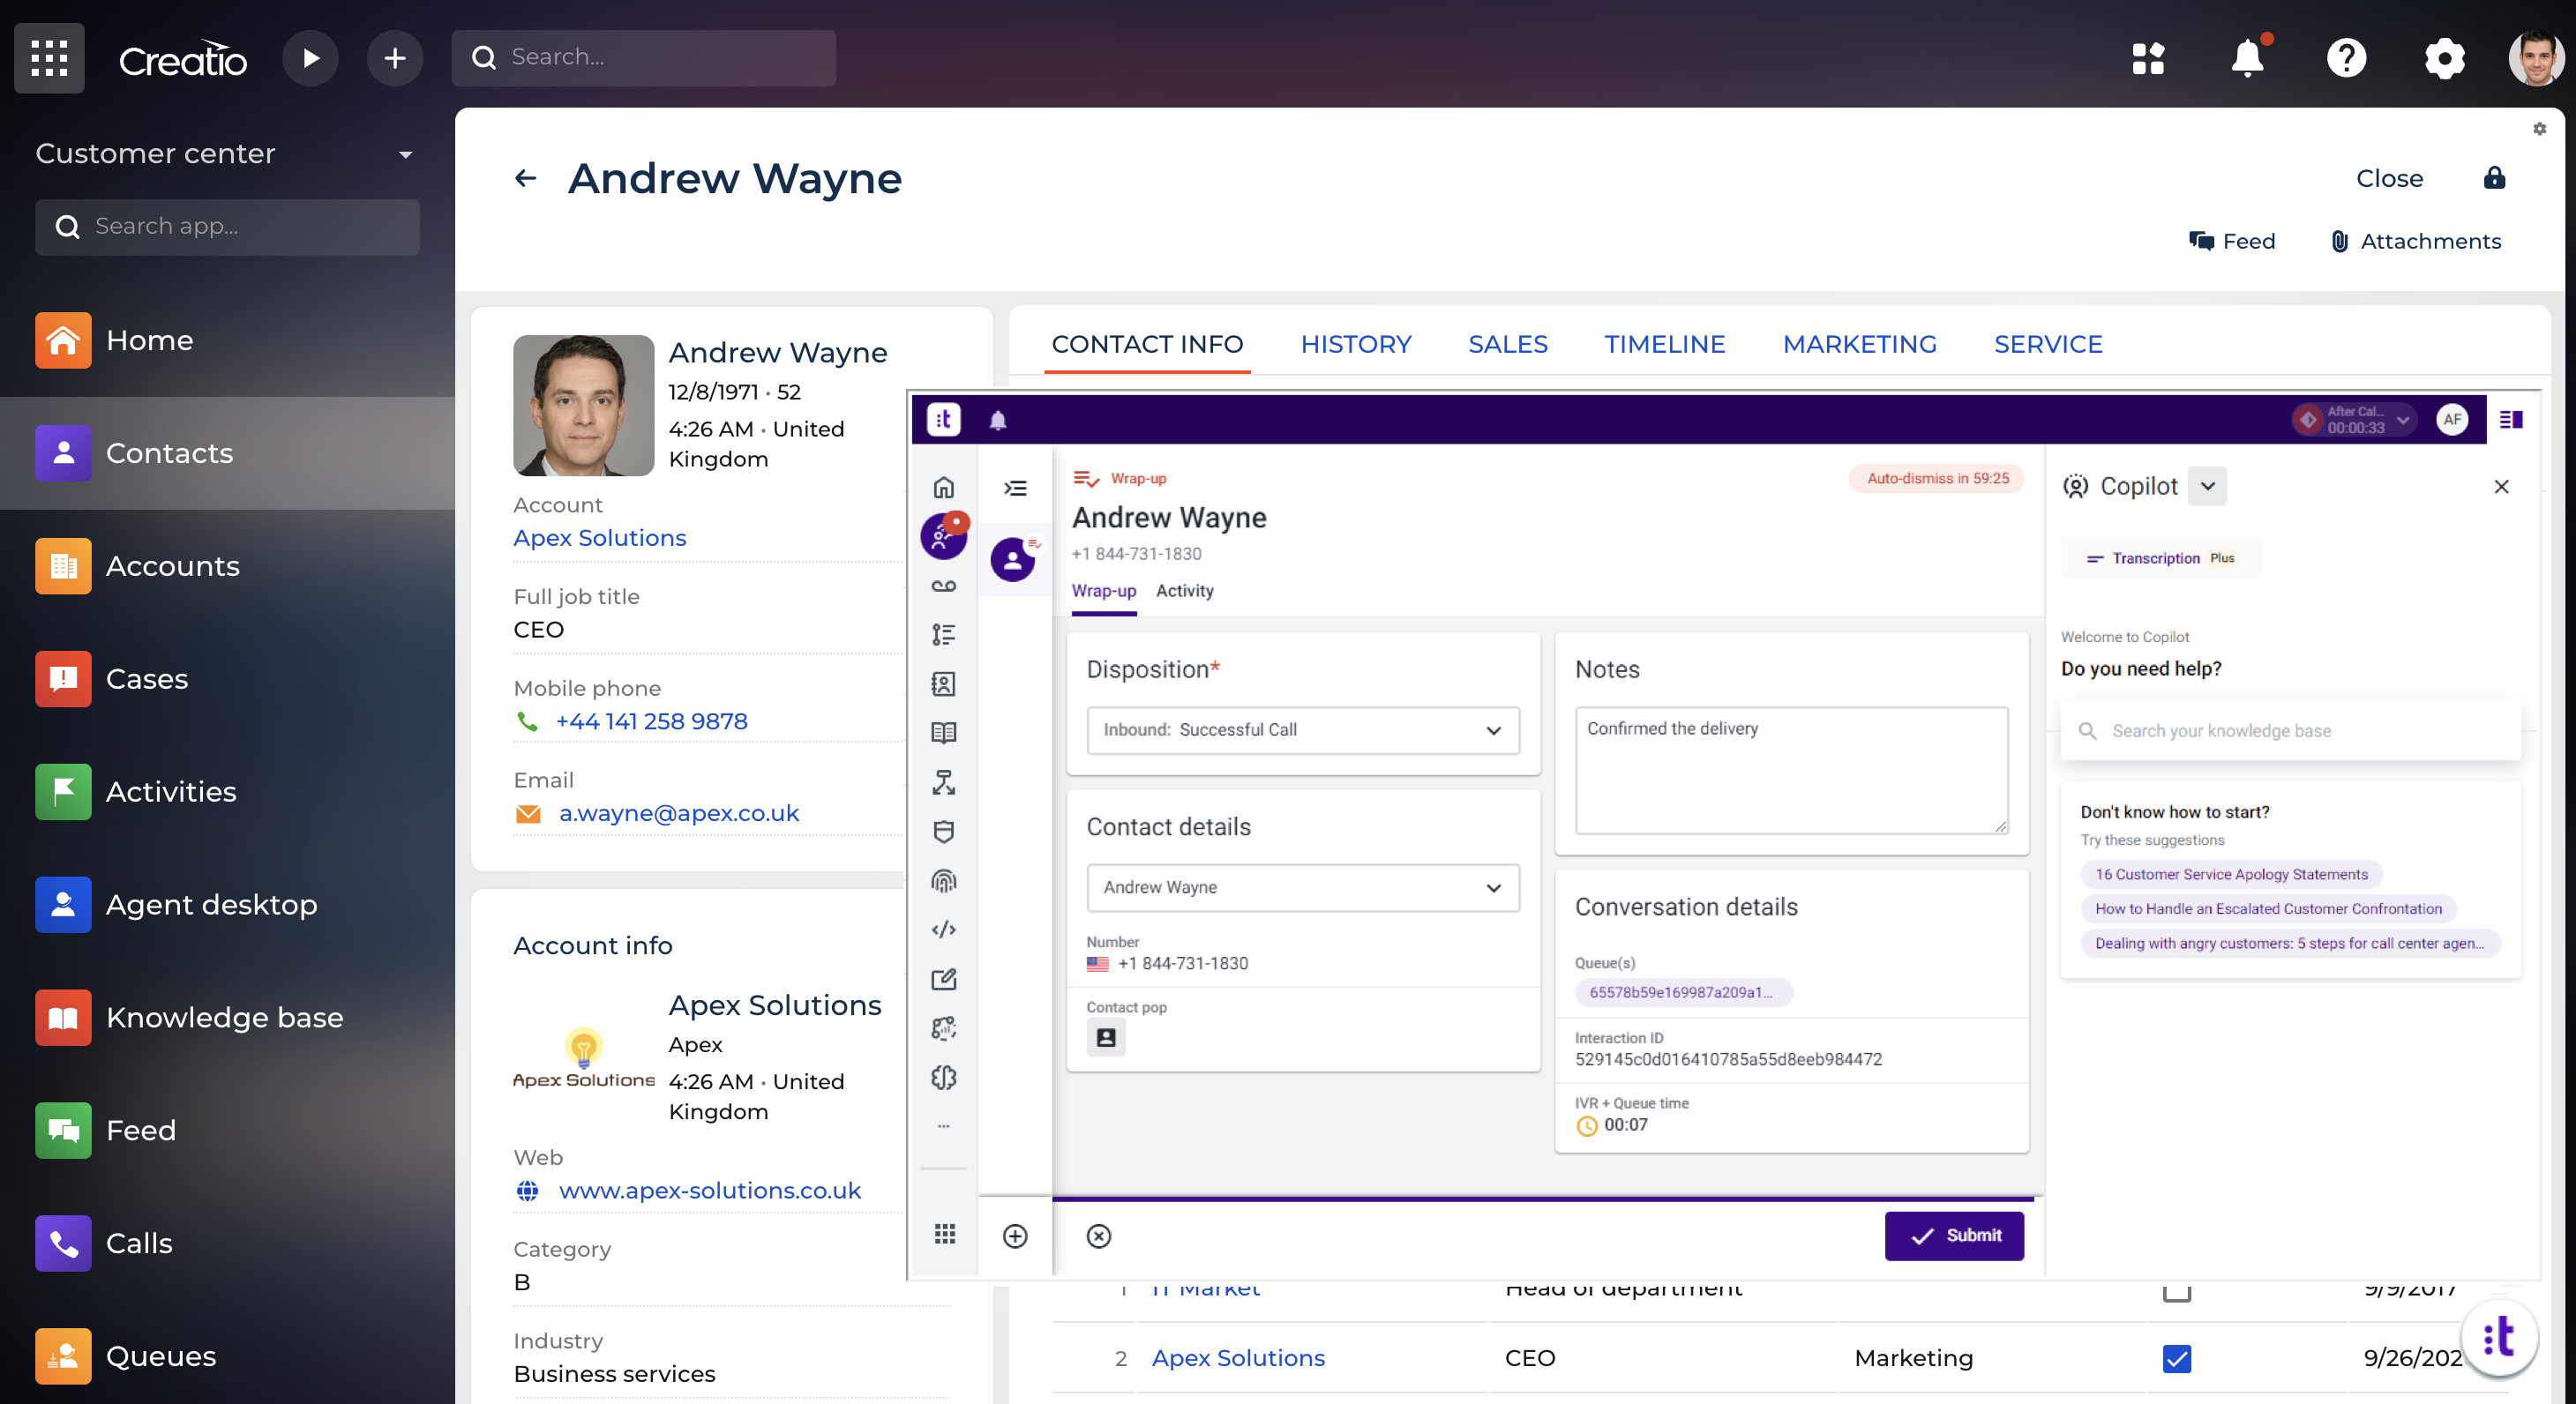
Indicate a call result
- Save call information in the system
- Keep track of call analytics
- Show call history
-
Manage agent state
Chat Features:
-
Send and receive messages
-
Store chat data within the system
-
Access and view chat history
Notes:
Call recordings are currently not available in Creatio. They can be accessed in your PBX as a part of built-in functionality.
To use this connector, you need an active Talkdesk subscription.
The functionality of the connector is dependent on the TalkDesk Agent Workspace. Some functional features, such as agent state management, can be available if they are supported by the TalkDesk Agent Workspace.
For a more detailed description of The Talkdesk connector for Creatio application, you can use our guide.
Pricing
Terms and Conditions
Support
Installation
Setup guide
The Velvetech’s Talkdesk connector for Creatio requires technical and system administration skills to configure and set up. Please contact Velvetech Support at creatio@velvetech.com for further assistance.
Data sharing
- By installing or downloading the App, you confirm that you agree with sharing your account data (name, email, phone, company and country) with the App Developer as their End User.
- The App Developer will process your data under their privacy policy.
Versions
Versions history
- Fixed click2call from Contact page, when Contact card opened from other sections (e.g. Email)
- General improvements
Manual app installation
- Open the needed app → the Packages tab - download the Markeplace app files.
- Click in the top right → Application Hub
- Click New application. This opens a window.
- Select Install from file and click Select in the window that opens.
- Click Select file on the page of the Marketplace App Installation Wizard and specify the app file path.
Compatibility notes